Thursday, February 28, 2019

How to Download Zedge Ringtones to iPhone from Computer


How to Download Zedge Ringtones to iPhone from Computer

It's recommended download Zedge ringtones from its website because its app is not as good as before.
#1. Online Download Zedge Ringtones to Computer

Since Zedge ringtone app is not a good one any more, you can also download ringtones to PC from Zedge website. But you’ll need to go online and create an account with Zedge Ringtones before you can be allowed access to browse featured ringtones. Here is how to download Zedge Ringtones to a computer in few steps:


Go to the Zedge ringtones official website. It will show you some ringtones there.


You can browse the ringtones, or you can search the ringtone you want in the search bar.


Click the play button and you can previerw the ringtone.


Then click the ringtone and you will see the download button there.


Click on it and it will start downloading the ringtone.


Note The ringtone you download from Zedge website is MP3 format which is not suitable for iPhone. So you need to convert it to M4R format and transfer the ringtone to your iPhone. The best-recommended tool for this task is iMyFone TunesMate. It can do the conversion and transfer all at once.

Sponsor ads:

Gihosoft Free iPhone Data Recovery:https://www.gihosoft.com/iphone-data-recovery-free.html

Gihosoft iPhone Data Recovery Free

Free iPhone Data Recovery Software for Windows/Mac

Recover up to 12+ types of files, including contacts, SMS, photos, WhatsApp, Viber, notes, etc.

Restore lost data from iOS devices directly or from iTunes and iCloud backup

Recover iPhone data lost due to iOS upgrade/jailbreak, accidental deletion, device lost or broken

Support all the latest iPhone, iPad and iPod Touch

Both Free and Pro version.

If you lost data after you updated to a new iPhone, you can always use Gihosoft iPhone Data Recovery to get the data back from the old iPhone or backup.You may also like: iphonerecovery.com

If you use android phones, please choose Gihosoft Android Data Recovery.

With Gihosoft Android Data Recovery, no longer afraid of data loss!

Must read:Youtube video downloader for pc

Gihosoft RePicvid Free Photo Recovery Software provides a free photo recovery software for windows to help users recover the deleted or lost photo for free.

Jihosoft Android Data Recovery: the best Android Data Recovery software for Windows and Mac to recover deleted contacts, messages, photos, videos, WhatsApp and etc from Android devices.Tips:How to transfer messages from iPhone to iPhone

jihosoft Free iPhone Data Recovery

How Do I Turn a Song into an iPhone Ringtone without iTunes 12.7?

The recent update in iTunes does not have "Tones" tab as the older versions did, making it difficult to turn a song into an iPhone ringtone with iTunes. Now, many iPhone users wondering how to turn a song into an iPhone ringtone without iTunes 12.7.

You can turn a song into iPhone ringtone without iTunes 12.7. All you need is to download and install a free ringtone maker, and your best rack will become your iPhone custom ringtone. Hence, we shall be discussing how to turn a song into an iPhone ringtone in the next two parts of this post.


Method 1: Turn a Song into an iPhone Ringtone with iPhone App

We can use an iPhone app to turn a song into a ringtone on iPhone. Here we use GarageBand for iOS. This iOS app makes it pretty easy and incredibly simple for you to play, record and share songs between smartphones from anywhere, and gives you access to a wide range of instruments used around the world for you to make songs right from your iPhone, iPad or iPod touch.

Step-by-Step Guide to Turn a Song into an iPhone Ringtone with GarageBand for iOS:

  1. You’ll need to update your iOS device to the latest version before using this app. If you’ve done that, then click “+” at the top right corner of GarageBand app.
  2. Choose your Audio Input but selecting your Audio Recorder card.
  3. The next thing to do is to wait for your new window to load, then click on the menu icon (the three-line button) on the top left corner of your app window.
  4. It’s now time to import your song. Click on the loop icon in the right top corner of the app.
  5. Choose the source where you want to import the song from, it can be from your music library or iCloud Drive. If the song is on your iPhone, click the Music tab to import from your iPhone.
  6. Click and hold the files to drag it to the left side of GarageBand.
  7. Set the timer but don’t let it exceed 30 seconds.

    Sponsor ads:Share YouTube Video at Specific Time on Mobile and PCMust Read:If you lost data after you updated to a new iPhone, you can always use Gihosoft iPhone Data Recovery to get the data back from the old iPhone or backup.

    Gihosoft Free iPhone Data Recovery:iphonerecovery.com
    If you use android phones, please choose Gihosoft Android Data Recovery
  8. Hit the downward pointing Triangle icon on the top left of the page, and click “My Songs” to save the newly created ringtone.
After these steps, you’ve created your ringtone, but it’s still within the app. Here is how to export and use the newly created ringtone.
  1. Go back to the GarageBand home screen and click the Select tab on the top right bar. The ringtone will start jiggling, tap the box to mark it blue and click the top left Upload icon.
  2. Apple’s default share page will appear, click on Ringtone icon to confirm. Name your ringtone and hit “Export”.
  3. When the export is complete, a notification tray will pop up, click “Use Ringtone As… > Standard Ringtone”. This would set the newly created ringtone as your iPhone ringtone.

Disadvantages of Using GarageBand in Making Ringtones for iPhone:

  1. The process of turning a song to iPhone ringtone using GarageBand is rigorous and tiring.
  2. If you are new to this app, you’ll notice the limitation to a small number of smart instruments.
  3. The app only permits the most recent version of iOS, so any person with earlier version will not be able to access this app.
Sponsor ads:
Gihosoft iPhone Data Recovery Free
Free iPhone Data Recovery Software for Windows/Mac
Recover up to 12+ types of files, including contacts, SMS, photos, WhatsApp, Viber, notes, etc.
Restore lost data from iOS devices directly or from iTunes and iCloud backup
Recover iPhone data lost due to iOS upgrade/jailbreak, accidental deletion, device lost or broken
Support all the latest iPhone, iPad and iPod Touch
Both Free and Pro version.
If you lost data after you updated to a new iPhone, you can always use Gihosoft iPhone Data Recovery to get the data back from the old iPhone or backup.You may also like: iphonerecovery.com
If you use android phones, please choose Gihosoft Android Data Recovery.
With Gihosoft Android Data Recovery, no longer afraid of data loss!
Gihosoft RePicvid Free Photo Recovery Software provides a free photo recovery software for windows to help users recover the deleted or lost photo for free.
Jihosoft Android Data Recovery: the best Android Data Recovery software for Windows and Mac to recover deleted contacts, messages, photos, videos, WhatsApp and etc from Android devices.Tips:How to transfer messages from iPhone to iPhone

Tips to Instantly Fix YouTube Playback Error 2019

Tips to Instantly Fix YouTube Playback Error 2019
You may be worried when you play YouTube videos and see a notification “YouTube playback error, please try again later”. This problem is common on YouTube. Most times, you can easily fix this YouTube error by refreshing your browser. Or you can try the following solutions to check if they work perfectly for you:

Clear History, Cookies, and Cache on your browser.

You can pause the video and change the video resolution (360p, 480p, 720p) as indicated by the YouTube player.

Ensure that your plug-ins is updated to the latest version.

You can disconnect graphics hardware acceleration. Make sure you save your data before you restart your browser.

Disconnect youtube.com in the HTTPS and watch YouTube videos in your browser profile.

You can reset the router, and this can often solve the issue “YouTube playback error”.


Other Four Methods to Fix YouTube Playback Error

If the steps discussed above didn’t work for you, try the four methods below. You don’t need to try all these methods, but you can try them until you get the one that works for you.
1 Sign Out Your Google Account from YouTube

Sign out your Google account if you have signed in to YouTube; try to make use of the YouTube again. If Google account caused the problem, it would be resolved immediately.
2 Uninstall YouTube and Reinstall It

If your YouTube app has any setback, the problem may be showing YouTube playback error. To fix the problem, you can uninstall and reinstall your YouTube app.
3 Update the Router Firmware

Most iPhone users claimed that updating the router firmware works perfectly for them. If you want to update the router firmware, you have to check the latest model online. You can find the needed information on the router seller’s website.
4 Change the DNS Address

You can follow these steps to change the DNS address to fix YouTube playback error:


Step 1: Click on the device settings

Step 2: Click on Wi-Fi. (Make sure that your iPhone can connect to the Wi-Fi network.)

Step 3: Select the information icon

Step 4: Finally, you can change the DNS to 8.8.8.8.
How to Download YouTube Video for Free

After knowing how to fix YouTube playback error, do you know how to download YouTube video? The best way to download YouTube video for free is on some recommended websites. Here are some of the sites to download YouTube videos for free:
1 save-vid.com

save-vid.com allows users to download YouTube video for free. Paste the web address, choose the video format and tap on Download. Apart from YouTube, many online video websites are supported for you to download their data.


2 Savefrom.net

There are many ways to download your YouTube videos, and Savefrom.net makes it easy for you. If you want to watch video on your browser, all you have to do is to include “ss” in front of youtube.com in the web address.Sponsor ads:Hack Someone’s Cell Phone With Just Their Number
Sponsor ads:Fix Windows 10/8 100% Disk Usage with 5 Methods 2019

For instance, http://www.ssyoutube.com/watchXXXX which looks good, isn’t it?


3 VideoGrabber.net

VideoGrabber.net makes it easier for you to download YouTube video. To download video on this website, paste the YouTube web address on the field, click “OK” and the applet will set up your request. This website will permit you to convert video formats for local files.


4 FLVto.com

FLV.com provides an easy method to download video from YouTube by pasting the web address. You have to install a program on your computer to download the video yourself. Otherwise, you will only have the copy of the audio in MP3 format; this makes this service ideal for people that want to download music from YouTube videos.


5 Ace Downloader

Ace downloader is a downloading service that works perfectly with Java applet on your browser. The process may be slow, but the website is visually attractive. You have to download software to able to use it.Sponsor ads:

Gihosoft Free iPhone Data Recovery:https://www.gihosoft.com/iphone-data-recovery-free.html

Gihosoft iPhone Data Recovery Free

Free iPhone Data Recovery Software for Windows/Mac

Recover up to 12+ types of files, including contacts, SMS, photos, WhatsApp, Viber, notes, etc.

Restore lost data from iOS devices directly or from iTunes and iCloud backup

Recover iPhone data lost due to iOS upgrade/jailbreak, accidental deletion, device lost or broken

Support all the latest iPhone, iPad and iPod Touch

Both Free and Pro version.

If you lost data after you updated to a new iPhone, you can always use Gihosoft iPhone Data Recovery to get the data back from the old iPhone or backup.You may also like: iphonerecovery.com

If you use android phones, please choose Gihosoft Android Data Recovery.

With Gihosoft Android Data Recovery, no longer afraid of data loss!

Must read:Youtube video downloader for pc

Gihosoft RePicvid Free Photo Recovery Software provides a free photo recovery software for windows to help users recover the deleted or lost photo for free.

Jihosoft Android Data Recovery: the best Android Data Recovery software for Windows and Mac to recover deleted contacts, messages, photos, videos, WhatsApp and etc from Android devices.Tips:How to transfer messages from iPhone to iPhone

Also Read:How to Delete Embarrassing Word Suggestions from Android Keyboard

Also Read:5 Best Video to MP3 Converter to Extract Audio from Video Files
jihosoft Free iPhone Data Recovery


How to Add YouTube Video from Computer to iPhone

iMyFone TunesMate allows users to add video files from iPhone to the computer, including Music videos, Movies, TV Shows etc. This makes it easy for users to watch their favorite videos and movies. It can also be used to transfer saved movies or videos like YouTube videos to your iPhone.

Wednesday, February 27, 2019

Top Solutions to Fix iCloud Photos Not Downloading 2019


Question: What is the best way to fix an error downloading from iCloud photo library?

Given how limited an iPhone’s storage is, the best way to conserve your storage space is to have your photos kept on your iCloud account. But, as of recently, many iCloud users have been having issues with their iCloud photos not downloading. If this is an error that you’ve had to deal with, read our guide below for some of the most effective fixes.

The precise reason for experiencing issues with iCloud photo library is unknown as there are a lot of different causes. For that reason, we’ve detailed some of the fixes that we’ve found to be useful for fixing the problem below.

Sponsor ads:iPhone/iPad Keeps Restarting? Here’s the Fix!
Fix 1: Turn Airplane Mode off & on through Settings


Fix 2: Restart Your iOS Device


Fix 3: Check Your iPhone’s Storage Space


Fix 4: Sign out & back into iCloud


Fix 5: Enable Cellular Data for Photos


Fix 6: Enable “Download and Keep Originals”


Fix 7: Reset Your iPhone & Restore from iCloud Backup


Fix 8: An All-in-One Tool to Fix iCloud Photo Library Cannot Download Photos
Fix 1: Turn Airplane Mode off & on through Settings

One of the first things that you should check is your iPhone’s network connection. If there is a problem with the connection, then this will prevent iCloud from working properly. Rather than disable every individual network connection, you can use Airplane Mode.

1. Unlock your iPhone and open the “Settings” app.

2. Below your iCloud name at the top of the menu, tap on the “Airplane Mode” slider to enable it.

3. Wait about 30 seconds, tap on the slider to disable Airplane Mode, and your connections will be reestablished.

Airplane Mode disconnects Bluetooth, Wi-Fi, and data connections. If the problem lies with either of these then this will fix it.


Fix 2: Restart Your iOS Device

Sometimes all you need is to turn your iPhone off and back on. Even though most people say this as a joke, it can actually fix the majority of tech-related issues.

1. Double click the home button and swipe upwards on all of your apps to close them.

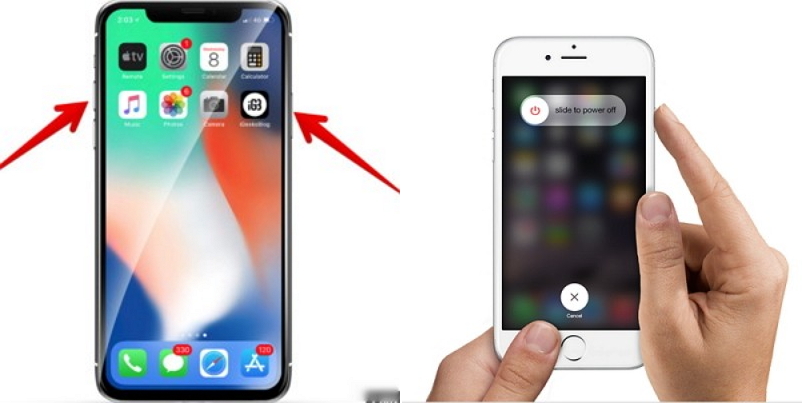
2. Hold your iPhone’s lock key until the power slider appears. Swipe this slider to turn it off.

3. Wait about 30 seconds until your iPhone has turned off, then turn it back on.


It’s important that you force close all of your apps. By doing this, you can rule out whether or not an app could be interfering with iCloud.
Fix 3: Check Your iPhone’s Storage Space

If there isn’t sufficient space for your iCloud photos to download, you won’t be able to access them. Fortunately, checking your iCloud’s storage is easy.

1. Open the “Settings” app.

2. Swipe down to “Storage & iCloud Usage”.

3. Check the storage information.


Unless you take hundreds of photos, if you have a newer iPhone then it’s unlikely that storage will be a problem. Nonetheless, you should check it.
Fix 4: Sign out & back into iCloud

If storage isn’t the issue, then it could be an iCloud problem. By signing out and back into your iCloud account, you can check if this is the case.

1. Open the “Settings” app and tap on your name at the top of the menu.

2. Swipe to the bottom and tap on “Sign Out”. You may be prompted to enter your account password.

3. Once you’ve signed out, wait a few minutes and sign back in.


All this will do is refresh the connection and if there was an issue beforehand, this will resolve it.
Fix 5: Enable Cellular Data for Photos

The problem could be as simple as accidentally disabling a setting. One specific setting that you should check is whether or not photos are set to download using your cellular data.

All you have to do here is go to “Settings > Cellular”, and check if it is enabled or disabled. If it hasn’t been enabled, do so now.


Fix 6: Enable “Download and Keep Originals”

iCloud is a very flexible platform and offers multiple photo management settings. You can change one of these settings and, hopefully, it will fix iCloud photo library not working.

1. Go to “Settings > YourName > iCloud > Photos”.

2. Instead of “Optimize iPhone Storage”, tap on “Download and Keep Originals”.

3. The original photos will now be downloaded.


The only downside to changing this setting is that more of your iPhone’s storage will be filled. If you have limited storage, you should try something else beforehand.
Fix 7: Reset Your iPhone & Restore from iCloud Backup

Have none of the fixes so far helped to fix the error iCloud photo library? As a last resort, you can try resetting your iPhone and restoring your data from an iCloud backup.

1. Go to “Settings > General > Reset” and tap on “Erase All Content and Settings”.

2. You’ll be asked to enter your passcode and after doing so, the device will be wiped.

3. Once your data is removed you will be given the option to “Restore Backup from iCloud”. Select the backup that you want to restore, and your data will be downloaded again.


Make sure that before you reset your iPhone, you take a backup of your data to ensure that you don’t lose important files.
Fix 8: An All-in-One Tool to Fix iCloud Photo Library Cannot Download Photos

Sponsor ads:

Gihosoft Free iPhone Data Recovery:https://www.gihosoft.com/iphone-data-recovery-free.html

Gihosoft iPhone Data Recovery Free

Free iPhone Data Recovery Software for Windows/Mac

Recover up to 12+ types of files, including contacts, SMS, photos, WhatsApp, Viber, notes, etc.

Restore lost data from iOS devices directly or from iTunes and iCloud backup

Recover iPhone data lost due to iOS upgrade/jailbreak, accidental deletion, device lost or broken

Support all the latest iPhone, iPad and iPod Touch

Both Free and Pro version.

If you lost data after you updated to a new iPhone, you can always use Gihosoft iPhone Data Recovery to get the data back from the old iPhone or backup.You may also like: iphonerecovery.com

If you use android phones, please choose Gihosoft Android Data Recovery.

With Gihosoft Android Data Recovery, no longer afraid of data loss!

Must read:Youtube video downloader for pc

Gihosoft RePicvid Free Photo Recovery Software provides a free photo recovery software for windows to help users recover the deleted or lost photo for free.

Jihosoft Android Data Recovery: the best Android Data Recovery software for Windows and Mac to recover deleted contacts, messages, photos, videos, WhatsApp and etc from Android devices.Tips:How to transfer messages from iPhone to iPhone


jihosoft Free iPhone Data Recovery

Ways to Fix iPhone Photos Not Showing Up on PC 2019


5 Common Solutions

Here are some other methods to resolve iPhone photos not showing up on PC:
1Reboot Computer and Restart Your iPhone

This is the easiest method to restore iPhone photos; this method will not delete any file on your iPhone.
2Change the USB Port of Your PC

You can try other USB port if you have anyone.
3Unlock Your iPhone

Ensure that your iPhone is unlocked and has trusted computer. If your iPhone is locked, the camera roll containing all your photos will be empty. Try to disconnect your iPhone and unlock your iPhone screen, connect your iPhone back to the computer. After few minutes, the iPhone photos not showing up on PC problem will be solved.


4Authorize the Computer

Step 1: Connect your iPhone with a USB cable.

Step 2: Click on iTunes main menu.

Step 3: Open account authorizations.

Step 4: Authorize your computer.

Step 5: Insert your username and password. Then, you can now see the photos showing on your computer.


5 Restore iPhone with iTunes

Step 1: Click on iTunes on your computer used to back up your device.

Step 2: Use your USB cable to connect your iPhone to your computer.

Step 3: Choose your iPhone when it appears in iTunes. If your device does not display on iTunes, tap on learn more.

Step 4: Click on restore backup in iTunes.

Step 5: Check the size and date of each backup and select the most relevant.

Step 6: Tap on restore and wait for few minutes to finish.

Step 7: Make sure your device is connected after it restarts and wait for some minutes to sync with your computer. You can disconnect your device when the sync is complete.


Sponsor ads:

Gihosoft Free iPhone Data Recovery:https://www.gihosoft.com/iphone-data-recovery-free.html

Gihosoft iPhone Data Recovery Free

Free iPhone Data Recovery Software for Windows/Mac

Recover up to 12+ types of files, including contacts, SMS, photos, WhatsApp, Viber, notes, etc.

Restore lost data from iOS devices directly or from iTunes and iCloud backup

Recover iPhone data lost due to iOS upgrade/jailbreak, accidental deletion, device lost or broken

Support all the latest iPhone, iPad and iPod Touch

Both Free and Pro version.

If you lost data after you updated to a new iPhone, you can always use Gihosoft iPhone Data Recovery to get the data back from the old iPhone or backup.You may also like: iphonerecovery.com

If you use android phones, please choose Gihosoft Android Data Recovery.

With Gihosoft Android Data Recovery, no longer afraid of data loss!

Must read:Youtube video downloader for pc

Gihosoft RePicvid Free Photo Recovery Software provides a free photo recovery software for windows to help users recover the deleted or lost photo for free.

Jihosoft Android Data Recovery: the best Android Data Recovery software for Windows and Mac to recover deleted contacts, messages, photos, videos, WhatsApp and etc from Android devices.Tips:How to transfer messages from iPhone to iPhone

jihosoft Free iPhone Data Recovery

How to Check iPhone WhatsApp Messages Online


WhatsApp has kept evolving since the day we first heard of it. With more and more updates and new features, it made its way to almost all the smartphone users. However, sometimes, we feel the need to check the chat history online as well.

If you are here, you must be looking for a way to check iPhone whatsapp messages online, right? How would you like if we say that you not only can read your iPhone whatsapp messages online but also extract them to your computer, hassle free and in a very secure way? To read iPhone whatsapp messages online, you can use the web browser to access your WhatsApp accoount on your computer. Now we'll tell you how to do it.
1. How to Check iPhone WhatsApp Messages Online

WhatsApp itself provides the access to your WhatsApp account on web. The below mentioned steps will guide you to check iPhone whatsapp messages online using a web browser on your compute.

Step 1 – First, launch your web browser on a computer and visit to www.web.whatsapp.com. You will find a QR code appearing on your computer screen.


Step 2 – Now, launch the WhatsApp app on your iPhone and then tap on 'Settings' tab available on the bottom right corner

Step 3 – From the next appearing screen, locate and get into the 'WhatsApp web' option and then press on 'Scan QR Code'. Next, you will see a screen with a QR code scanner running on it.

Step 4 – Scan the QR Code on your computer screen with your iPhone and you're done. You can now fully access iPhone whatsapp messages online.


2. How to Access WhatsApp Messages without iPhone

Sponsor ads:

Gihosoft Free iPhone Data Recovery:https://www.gihosoft.com/iphone-data-recovery-free.html

Gihosoft iPhone Data Recovery Free

Free iPhone Data Recovery Software for Windows/Mac

Recover up to 12+ types of files, including contacts, SMS, photos, WhatsApp, Viber, notes, etc.

Restore lost data from iOS devices directly or from iTunes and iCloud backup

Recover iPhone data lost due to iOS upgrade/jailbreak, accidental deletion, device lost or broken

Support all the latest iPhone, iPad and iPod Touch

Both Free and Pro version.

If you lost data after you updated to a new iPhone, you can always use Gihosoft iPhone Data Recovery to get the data back from the old iPhone or backup.You may also like: iphonerecovery.com

If you use android phones, please choose Gihosoft Android Data Recovery.

With Gihosoft Android Data Recovery, no longer afraid of data loss!

Must read:Youtube video downloader for pc

Gihosoft RePicvid Free Photo Recovery Software provides a free photo recovery software for windows to help users recover the deleted or lost photo for free.

Jihosoft Android Data Recovery: the best Android Data Recovery software for Windows and Mac to recover deleted contacts, messages, photos, videos, WhatsApp and etc from Android devices.Tips:How to transfer messages from iPhone to iPhone

jihosoft Free iPhone Data Recovery

How to Fix iTunes Cannot Restore Because Backup Session Failed


Have you ever tried restoring content through iTunes? There are so many ways to restore backup and iTunes backup is one of the popular options. However, you may have encountered different kinds of problems when you are restoring consent through iTunes. Here, we are going to help you see the possible fixes when your backup session fails while restoring content through iTunes.

Let us see some of the possible fixes you can use.


Tip 1. Check windows security settings


Tip 2. Delete unnecessary content


Tip 3. Rename old backup files


Tip 4. Reset iTunes lockdown folder


Tip 5. Better way to backup and restore content without iTunes
Tip 1. Check windows security settings

Sometimes it may so happen that owing to some error in the Windows PC, the backup may never complete. You may have to update, disable, uninstall or even configure the security software on your Windows PC.

You can either choose to reset the lockdown folder or even take backup on another device. Further, try to delete unwanted content and see if the backup session works this time around.
Tip 2. Delete unnecessary content

If you have a lot of unwanted content on your PC, you may find difficulties while creating a backup. So, you should delete all the junk files from the computer and then takes a new backup again.
Tip 3. Rename old backup files

Sometimes, the old backup files may have the same name to the new one and this might be the causes of the problem. So, you should make it a point to rename either of the backup files and make it easier to spot the new ones.
Tip 4. Reset iTunes lockdown folder

You should make it a point to quit iTunes and then remove any iOS devices which is attached to the computer.

Head to C:\Progream data\Apple\Lockdown and then select all the files present in there and delete them. This may sometimes fix this issue.

These are some of the possible ways by which this problem can be fixed. However, if none of it works. It is better to look for an alternate way by which you can solve this problem. Let us see that.
Tip 5. Better way to backup and restore content without iTunes

Sponsor ads:

Gihosoft Free iPhone Data Recovery:https://www.gihosoft.com/iphone-data-recovery-free.html

Gihosoft iPhone Data Recovery Free

Free iPhone Data Recovery Software for Windows/Mac

Recover up to 12+ types of files, including contacts, SMS, photos, WhatsApp, Viber, notes, etc.

Restore lost data from iOS devices directly or from iTunes and iCloud backup

Recover iPhone data lost due to iOS upgrade/jailbreak, accidental deletion, device lost or broken

Support all the latest iPhone, iPad and iPod Touch

Both Free and Pro version.

If you lost data after you updated to a new iPhone, you can always use Gihosoft iPhone Data Recovery to get the data back from the old iPhone or backup.You may also like: iphonerecovery.com

If you use android phones, please choose Gihosoft Android Data Recovery.

With Gihosoft Android Data Recovery, no longer afraid of data loss!

Must read:Youtube video downloader for pc

Gihosoft RePicvid Free Photo Recovery Software provides a free photo recovery software for windows to help users recover the deleted or lost photo for free.

Jihosoft Android Data Recovery: the best Android Data Recovery software for Windows and Mac to recover deleted contacts, messages, photos, videos, WhatsApp and etc from Android devices.Tips:How to transfer messages from iPhone to iPhone


jihosoft Free iPhone Data Recovery

How to Unlock iPad Passcode without Restore 2019


How to Unlock iPad Passcode without Restore 2019


It’s possible that you forgot your password to unlock your iPad if you change the password often. What’s worse, your iPad will be disabled if you try the wrong password for several times. In general, the way to unlock iPad passcode is using iTunes to restore iPad. But what if you really need to unlock iPad without restore as you don’t want to lose any data?
Is It Possible to Unlock iPad Password without Restoring?
Unfortunately, there is no official method for unlocking iPad passcode without restoring. Restoring iPhone is the only way to get into a locked iPad.
However, you can back up your iPad data before you restore the locked iPad. It will prevent you from losing any iPad data.
Steps to Back Up Locked iPad in iTunes:
Note: You should use the iTunes which your iPad synced with before. Or you can’t backup your locked iPad without password.

Launch iTunes on computer and connect your iPad with a lightning cable.

After iTunes has detected your iPad, click on the device icon at the top left corner.

Click “Back Up Now” in the right panel.

Of course, this method won’t fix the problem that you’re having but rather it will preserve your personal data.
How to Unlock iPad Passcode - The Complete Guide


2 Unlock iPad Using iTunes

If your iPad synced to your iTunes before, then you can use this method. Or, you need to restore your iPad in recovery mode.Sponsor ads:Setup Dual Monitors in Windows 10 Computer 2019
Sponsor ads:Recover Deleted Video and Audio Files from Android Phone
Sponsor ads:Free File Recovery Software 2019 for Windows and Mac


Launch iTunes (which your iPad synced with before) and connect your iPad using a USB cable.


After it has been detected, click on the device icon on iTunes and you will be in “Summary” window.


Click on “Restore iPad” in the right panel and follow the steps shown on-screen. Then just wait for it to finish.


Note: The iTunes you used should be the one you used to sync iPad before. Besides, if your iPad is running in iOS 11.4 or later, the "USB Accessories" in "Settings > Touch ID & Passcode" should be enabled. This setting is disabled by default.
3 Unlock iPad through iCloud

Another option that you can consider is using iCloud to remove and unlock your iPad passcode. This way is available only when “Find My iPad” is enabled on your locked iPad.


Go to the iCloud page on computer and sign into your Apple account.


From the iCloud menu, click on “Find iPhone”.


Once the “Find My iPhone” web app has loaded, click on “All Devices” and select your iPad from the list of connected devices.


From the menu at the top-right, click on “Erase iPhone”.


Type your iCloud passcode and the device will be remotely erased and afterwards.


Note: This way will take effect when your iPad has connection to internet.
4 Restore Locked iPad with Recovery Mode

If you never synced your iPad with iTunes, or if “Find My iPad” is off, then try this way.

1. Connect your iPad to computer to open iTunes.

2. While connecting, force restart your iPad:


For iPhone X or iPhone 8 (8 Plus), press and quickly release the Volume Up button. Then press and quickly release the Volume Down button. Then hold the Side button until you see the recovery-mode screen.


For iPhone 7 (7 Plus), hold the Side and Volume Down buttons together until you see the recovery-mode screen.


For iPhone 6s and earlier, iPad or iPod touch, hold the Home and Sleep/Wake button together until you see the recovery-mode screen.


3. On computer, you will see a window pop up, choose Restore on it.

4. iTunes will download the latest iOS to your iPad. If it takes more than 15 minutes, your iPad will exist recovery mode. Then you need to repeat steps 2 and 3.

Tuesday, February 26, 2019

iCloud Backup Greyed Out and How to Fix It (iOS 12 included)


Part 1. Why is iCloud Backup Greyed Out

One of the reasons the Back Up Now button may be greyed out is because you are not connected to Wi-Fi. It could also signify a restricted network such as a public internet network that can be set to prevent a network heavy activity like an iCloud backup.

It is also likely that Apple servers could be having difficulties at the moment. So before attempting any solutions go to official site of Apple to check the system status.

In case the servers are down, all you have to do is wait a while and the “Back Up Now” button will be restored in time. If you are on a restricted connection, you may want to contact your IT department or the system administrator for assistance or simply connect to another Wi-Fi network.
Part 2. Solutions for iCloud Backup Greyed Out Error

The following are some of the troubleshooting steps you can take if you’ve connected to another network and the Apple servers are working just fine but your iCloud is still greyed out.


Go to Settings >iCloud and tap on your Apple ID. Sign out of iCloud. Wait 30 seconds and then sign back in.


Go to Settings> Airplane Mode to verify that Airplane mode is turned off.


Make sure that the device is connected to Wi-Fi.
Sponsor ads:
Gihosoft iPhone Data Recovery Free
Free iPhone Data Recovery Software for Windows/Mac
Recover up to 12+ types of files, including contacts, SMS, photos, WhatsApp, Viber, notes, etc.
Restore lost data from iOS devices directly or from iTunes and iCloud backup
Recover iPhone data lost due to iOS upgrade/jailbreak, accidental deletion, device lost or broken
Support all the latest iPhone, iPad and iPod Touch
Both Free and Pro version.
If you lost data after you updated to a new iPhone, you can always use Gihosoft iPhone Data Recovery to get the data back from the old iPhone or backup.You may also like: iphonerecovery.com
If you use android phones, please choose Gihosoft Android Data Recovery.
With Gihosoft Android Data Recovery, no longer afraid of data loss!
Gihosoft RePicvid Free Photo Recovery Software provides a free photo recovery software for windows to help users recover the deleted or lost photo for free.
Jihosoft Android Data Recovery: the best Android Data Recovery software for Windows and Mac to recover deleted contacts, messages, photos, videos, WhatsApp and etc from Android devices.Tips:How to transfer messages from iPhone to iPhone


Go to Settings > General> Restrictions > Accounts and set this to Allow Changes if it isn’t already.


You can also reset the network settings by going to Settings > General > Reset > Reset Network Settings.


Update your device to the latest version of iOS. Go to Settings > General > Software Update.


Go to Settings > General > About > Available to make sure that you have at least 50MB available storage for the backup.
Part 3. How to Back Up iPhone When iCloud Backup is Greyed Out
Sponsor ads:iPhone/iPad Keeps Restarting? Here’s the Fix!


Sponsor ads:Set Spam Filter on iPhone to Stop Junk Mails and Texts

Import iPhone Photos to Windows 7 2019


1 Import iPhone Photos to Windows 7 Via File Explorer

The process to import your iPhone photos via Windows 7 file explorer is also quite easy. However, keep in mind that you can only import JPG photos with this method. HEIC photos cannot be previewed via Windows 7 File Explorer.

Follow these instructions to import iPhone photos via Windows 7 Explorer:

Note

First make sure iTunes is installed on your computer, so that your iDevice is detected and there are no compatibility issues.

Step 1: Connect your iPhone to your PC via USB cable. And open Computer.

Step 2: Now click on the iPhone sub-menu (your device’s name may be shown here).

Step 3: Navigate to DCIM folder in the Internal Storage and then select the photos you wish to import to your PC.


Step 4: After the selection, simply use Windows’ copy feature (right-click and choose Copy) and then Paste it (right-click and choose Paste) in your desired folder on your computer’s hard drive. Your selected photos will begin transferring.
3 Import iPhone Photos to Windows 7 Via AutoPlay

You can also import your iPhone photos to your computer via Windows 7 AutoPlay. However, just like the above mentioned method you cannot view HEIC photos with the AutoPlay as well. So this method is also only suitable for transferring JPG photos.

Follow these steps to import iPhone photos to Windows 7 via AutoPlay:

Note

Make sure iTunes is installed on your computer. If not, download and install it on your computer first to ensure that there are no compatibility or detection issues.


Step 1: Use a compatible USB cable to connect your iPhone to your PC. Now, AutoPlay window will pop-up automatically.

Step 2: Click on Import pictures option.

Step 3: Then select your desired folder on your computer to start the import process.


Sponsor ads:

Gihosoft Free iPhone Data Recovery:https://www.gihosoft.com/iphone-data-recovery-free.html

Gihosoft iPhone Data Recovery Free

Free iPhone Data Recovery Software for Windows/Mac

Recover up to 12+ types of files, including contacts, SMS, photos, WhatsApp, Viber, notes, etc.

Restore lost data from iOS devices directly or from iTunes and iCloud backup

Recover iPhone data lost due to iOS upgrade/jailbreak, accidental deletion, device lost or broken

Support all the latest iPhone, iPad and iPod Touch

Both Free and Pro version.

If you lost data after you updated to a new iPhone, you can always use Gihosoft iPhone Data Recovery to get the data back from the old iPhone or backup.You may also like: iphonerecovery.com

If you use android phones, please choose Gihosoft Android Data Recovery.

With Gihosoft Android Data Recovery, no longer afraid of data loss!

Must read:Youtube video downloader for pc

Gihosoft RePicvid Free Photo Recovery Software provides a free photo recovery software for windows to help users recover the deleted or lost photo for free.

Jihosoft Android Data Recovery: the best Android Data Recovery software for Windows and Mac to recover deleted contacts, messages, photos, videos, WhatsApp and etc from Android devices.Tips:How to transfer messages from iPhone to iPhone


jihosoft Free iPhone Data Recovery

Quick Ways to Fix iTunes Backup Corrupt or Not Compatible Issue


“I wanted to restore my iPhone X using my iPhone 6+ but got this message. Do I need to upgrade both phones to latest iOS before proceeding? ip x is on 11.0.1 whereas ip 6+ is on 10. 3. Thanks in advance!”

Sometimes, it may so happen that your iTunes backup may fail to load properly. There can be various reasons for it. At times, the backup files become corrupt and sometimes they may not be compatible either. In such cases, the worst thing is the loss of data which will be entailed. So, you should make it a point to learn the best ways to fix it. Let us see what they are.
Part 1. Common Reasons for iTunes Backup Corrupt

Let us see some of the main reasons that are responsible for the backup being either corrupt or incompatible.
1. Backup Failed without Notice

Sometimes when you are making a backup, an error may have occurred but there was no message displayed. This gives you the false impression that the backup was done properly when in reality it was not so.
2. iOS Version Incompatibility

You need to understand that different iOS version can lead to problems on different devices. Suppose you try to restore an iOS 11 backup on your iPhone X, it is likely to show you an error. So, if you upgrade the iOS version and try to restore an old backup, it may lead to errors.Also Read:Voice Changing Apps & Software for Skype
3. Not Enough Space

When you are trying to restore an iTunes backup, and there is a lack of space, it is going to lead to plenty of problems. You should always have ample free space on your phone when you opt for restoration of iTunes backup.
Part 2. Selectively or Fully Back Up with iTunes

Now that you knew the possible reasons which can lead to corrupt or incompatible backup, let us see the possible fixes for it. Try the following tips to solve it


Tip 1. Delete corrupt or incompatible backup


Tip 2. Fully Back Up iPhone without Data Loss


Tip 3. Back Up Specific Data without Data Loss
Tip 1. Delete corrupt or incompatible backup

You can try to delete the corrupt or incompatible backup and here are the steps to be followed.

Steps for Mac


Open iTunes and then click on iTunes in the menu bar.


Now head to ‘Preferences’ and then click on the ‘Devices’ tab.


Now you should choose the backup which you want to remove


Now, click on the ‘Delete backup’ button

Steps for Windows


Open iTunes and then click on ‘Edit’


Now click on ‘Preferences’ and then move to ‘Devices’


Now choose the backup file which you want to delete


Now click on ‘Delete backup’


Once the backup file has been deleted, you can restore your iPhone when you have created a new backup file.


Tip 2. Fully Back Up iPhone Without Data Loss Also Read:Set a Voice Recording as a Ringtone on iPhone Xs/X/8/7/6s
Also Read:Blogging Apps for iPhone and iPad to Start Your Blog

Fix iTunes Error 7 (Windows Error 126/127) Issue 2019

2 Uninstall and Reinstall iTunes

Sometimes uninstalling iTunes and then reinstalling the freshly downloaded version will fix the problem.

Steps to Completely Uninstall iTunes

Step 1: Open control panel on your PC and navigate to Uninstall Programs option.
Step 2: Now uninstall these programs: iTunes, Bonjour, Apple Software Update, Apple Mobile Device Support, and Apple Application Support.
uninstall-itunes-components
Step 3: After uninstalling the programs, navigate to Local Disk (C:) and delete any relevant folders you find there.
Remove-iTunes
Step 4: Restart your computer.

Steps to Reinstall iTunes

Step 1: Download latest version of iTunes from the Apple website.
Download-iTunes
Step 2: Run the iTunes installer, agree to terms and agreements, choose installation options, and configure basic setup options, confirm if you want to make iTunes as your default music player and at the end, select the destination folder for installation.
Install iTunes
Step 3: After the installation is finished, select the “finish installing” option.
Step 4: Restart your computer.


3 Update Microsoft .NET Framework

If uninstalling and reinstalling iTunes does not fix the issue, then you should try updating Microsoft .NET Framework. Some users have stated that doing this fixed their iTunes 7 error. Follow these instructions to update Microsoft .NET Framework:
Step 1: Visit .NET Framework Website on your computer’s web browser and download the latest version of Microsoft .NET Framework. You can either download the web installer or an offline installer. Downloading the web installer is recommended because it will automatically determine the files and components needed for the .NET Framework for your computer and then download them.
Download-Net-Framework
Step 2: Once it is downloaded, run the installer. The setup will extract necessary installation files and then the installation will start. Perform any steps required to install .NET Framework.
Note
The time required to download and then install the .NET Framework may take a long time depending on the speed of your Internet as well as your computer’s hardware.

Also Read:Remove the U2 Album from iPhone in 2019