Monday, October 21, 2019

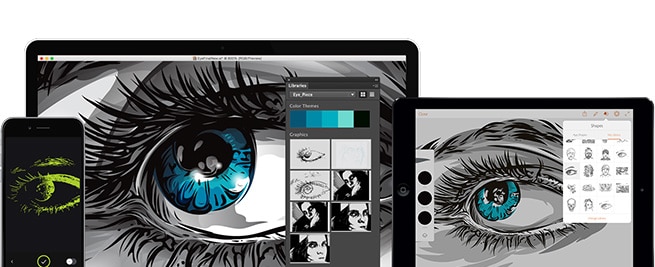
Adobe Intends to Launch Illustrator for iPad in 2020, ‘All-in’ on Photoshop for iPad


A report from last week claimed that Adobe still intends to launch Photoshop for iPad before the end of this year. It further claimed that the app was rudimentary in nature and not a full-fledged replacement of the desktop version that many users were hoping for. John Gruber from Daring Fireball has provided more information about Photoshop for iPad and how it is the real deal.

Gruber says that Adobe is “all-in” on Photoshop for iPad with the company is viewing it as a “serious, top-shelf project for creative professionals.”

The team of engineers working on it has grown significantly from a year ago, and they have plans to add features iteratively on an aggressive schedule. It’s reasonable to be disappointed that it isn’t further along feature-count-wise, but anyone who cares about Photoshop for iPad as a long-term product should be very excited about its foundation, direction, and the attention Adobe is paying to the fine details of a touch-first Photoshop UI.

The initial version of Photoshop CC for iPad will miss out on a number of key features. However, since it will feature the same code base and rendering engine as the desktop app, it will be able to open any PSDs files created on a PC. After the initial release, Adobe will start working on the UI and add more features to the app. The company has an aggressive timeline in terms of adding features to Photoshop for iPad, though bringing in all the features from the desktop app to the iPad is still going to take some time.

Another report from Bloomberg claims that Adobe will launch Illustrator for the iPad in 2020. The company will preview the app on the device at its upcoming Max conference in November. The company did something similar last year when it previewed Photoshop for iPad and set a release of 2019 for it.Also Read:Run and Use JioTV on PC/Mac

Also Read:Einthusan Alternatives


Adobe understands that most of its users are looking to ditch their laptops and work on something more portable while on the go. The iPad Pro with its powerful internals and long battery life is that device which is why Adobe is trying to bring its desktop apps to the platform.

Tuesday, October 8, 2019

How to Fix WhatsApp crashes in iOS 13

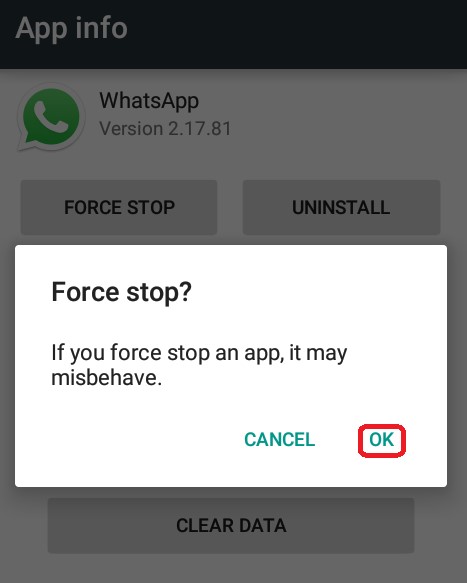
Way 1. Force Quit WhatsApp then Restart

Force quit then restart is a common quick fix across several system issues and WhatsApp crash iOS 13 isn’t an exception. It helps to get rid of minor random glitches and helps clear the app of minor problems. For iOS devices, this process is done by simply forcing the app to quit then launching it again. To perform this task:
Step 1. Press the "Home" button twice in quick succession.  This is just the equivalent of double-clicking an app icon on the computer.
Step 2. The subsequent screen would display the list of recently used apps. Go through the list to locate the WhatsApp program. Swipe up on WhatsApp icon to clear it from this list. If there are other background programs also running, you can clear them to avoid any confusion. Just follow the same procedure and remove them from the background. Wait for some few seconds then relaunch your WhatsApp.
force quit whatsapp

Way 2. Uninstall and Reinstall WhatsApp

If the above option fails to work, you can think of uninstalling then install the app. This is specifically a good option if the very WhatsApp program under question is corrupted and cannot work again. Here is how to uninstall and reinstall WhatsApp on iOS 13.
Step 1. On the Home screen, tap and keep a hold on any of the available apps on your phone.
Step 2. When the icons start to jiggle, locate WhatsApp and tap the "X" in the left corner of its icon. This will delete the faulty WhatsApp on your iPhone.
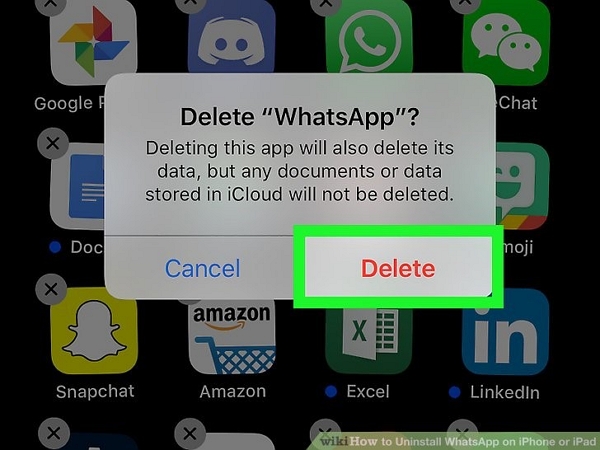
Step 3.Hit "Delete" to confirm that you actually want to uninstall the corrupted application.
uninstall whatsapp

Way 3. Perform A Soft Reset or Force Restart Your iPhone

If the problem persists, then consider soft reset or in simply terms restarting your device. This method is commonly known to fix several program glitches like those resulting in WhatsApp crashing. Remember this process does not touch your data. Therefore, be sure your data will remain safe throughout the entire process. This process is done as follows:
Step 1. Press and keep holding either the "Power" or "Side" button.
Step 2. When the Slide to Power Off menu appears, let free the Power button.
Step 3. Drag the slider to the right so that your iPhone goes off.
Step 4. Wait for about 30 seconds then press and hold the Power/Side button until the Apple logo appears.
soft restart iphone
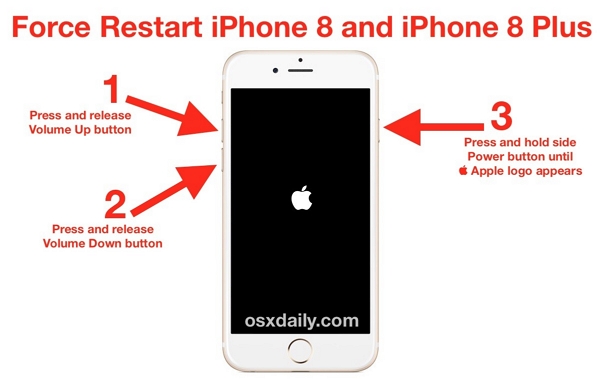
Now if your iOS device screen freezes and WhatsApp cease working or crashes, then a forced restart would be the option. This is an alternative reboot option for situations where the device freezes as a result of corrupted contents or simply errant apps. To perform forced restart:
Step 1. Press the "Volume Up" button and quickly release it.
Step 2. Press the "Volume Down" button and again release it.Also Read:Cool Games for Teenage Girls to Play on Android Phone 2019

Step 3. Now press and keep hold of the Side/Power button until you see the Apple logo.
Just like soft restart, your data will not be affected and therefore there is no need of creating a backup prior to this task.
force restart iphone

Way 4. Install available app updates

Keeping apps to date can be a perfect solution to fix WhatsApp crash iOS 13.1. It is known that some malicious programs or bugs tend to prevent certain applications from running as required. App developers always unleash new updates periodically just the way iOS updates keep rolling in. the updates are meant to ensure the apps run effectively and also come with security aspects to keep off any bugs that might interfere with the proper working of normal programs.
Step 1. Hit the App Store program icon your Home screen.
Step 2. From the App Store primary window, navigate to the bottom right and hit the Updates icon. The program would then display the list of apps with pending updates.
Step 3. To install the new updates to WhatsApp, simply tap the "Update" button beside the Snapchat.
Step 4. If there are several updates for the app, click "Update All" to get them installed at once.
install updates


Friday, July 19, 2019

How to Automatically Close Safari Tabs in iPhone and iPad


Did you know that Safari has a 500 tab limit? It will remember up to 500 tabs without slowing down your iPhone or iPad. Of course, it won’t cache all of those web pages and managing those hundreds of tabs can be quite difficult too. I’m one of those people who do not like closing tabs, even though there’s a quick shortcut for it (tap and hold the tab switcher). It seems like the designers at Cupertino empathize with me as there’s a new way to automatically close Safari tabs in iOS 13.
Close Safari Tabs in iOS 13 and iPadOS 13 on iPhone and iPad


When you try to close all tabs in Safari in iOS 13 or iPadOS 13 (using the tap and hold gesture on the tab switcher), you’ll see a new popup. This will only appear the first time you do this. It will ask you if you’re interested in automatically closing Safari tabs in the future. You can ask Safari to do this for you every day, every week or every month. I think for most people, the month timeframe is the best option.
How to Enable This Feature

If you missed that popup once, you don’t need to worry. You can go back and enable it or disable it at any time.

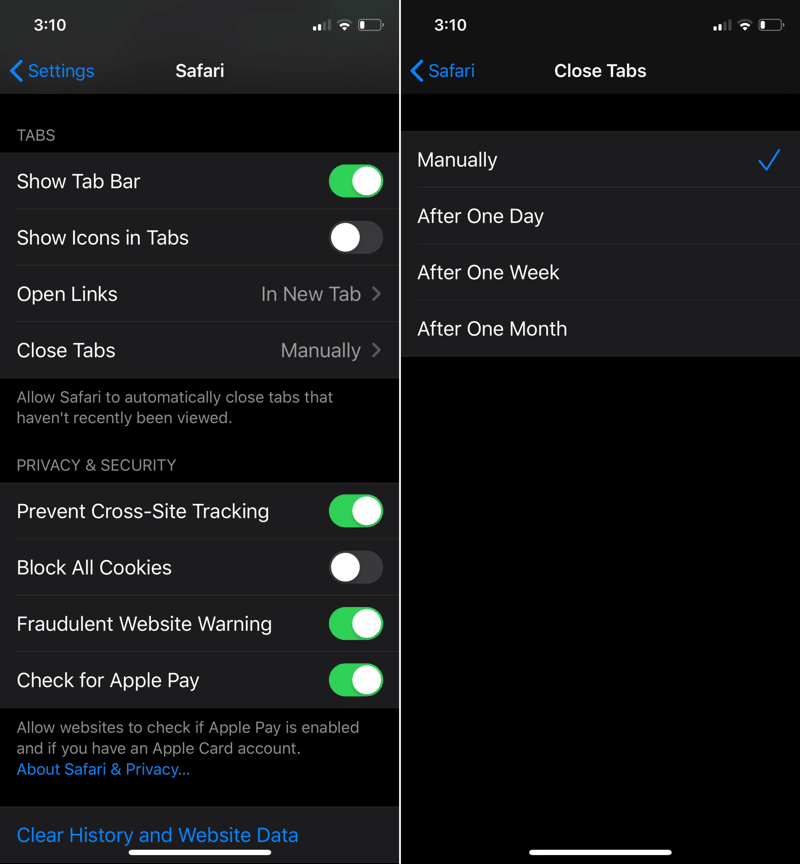
Step 1: Open Settings app.

Step 2: Tap on Safari.

Step 3: Go to the Close Tab section.

Step 4: From here, you can choose between the following options: Manually, After One Day, After One Week, and After One Month, depending on your needs.


If you choose the After One Day option, you can start using Safari with a clean slate every morning.
More iOS 13 How-tos

We’re working on bringing you more detailed guides for how to use the new and awesome features in iOS 13. Once you’ve read our iOS 13 tips and tricks article, read our how-tos below.read more:top paid android games

read more:limetorrents

read more:mp3boo alternatives


Thursday, July 11, 2019

How to Use Safari Download Manager on iPhone and iPad in iOS 13


How to Download a Video or an Audio While Browsing in Safari App

How many different apps have you used to download an audio or a video from a particular website on your iPhone or iPad? It’s time to delete those all apps and get straight into the Safari browser to download everything! Here’s how you can do it.

Step #1. Launch Safari app on your iPhone or iPad.

Step #2. Open any website to download a file, audio or a video.

Step #3. Long Press on audio or video and tap on Download linked file.


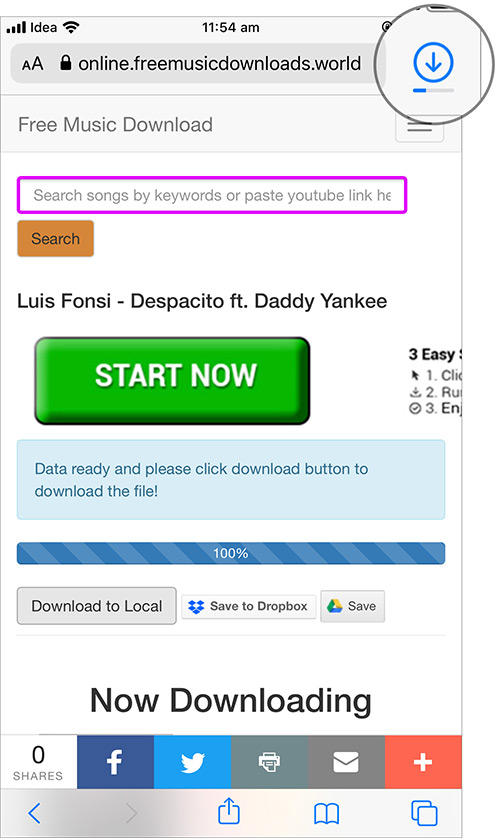
Step #4. Now you’ll see a video has started downloading in the icon (↓) on the top right corner.


Step #5. Once the download is completed, you can open the file by taping on it.


That’s it! This is how simple to download a file in Safari browser.

Now that you know how to download contents from Safari, it’s time to manage them and bring them collectively to a specified folder of your choice.
How to Change Safari’s Download Folder in iOS 13 and iPadOS

Before you download anything on Safari, make sure that the files you download goes into a specific folder and don’t congest your iCloud Drive with full of downloads. Here’s how you can do it.

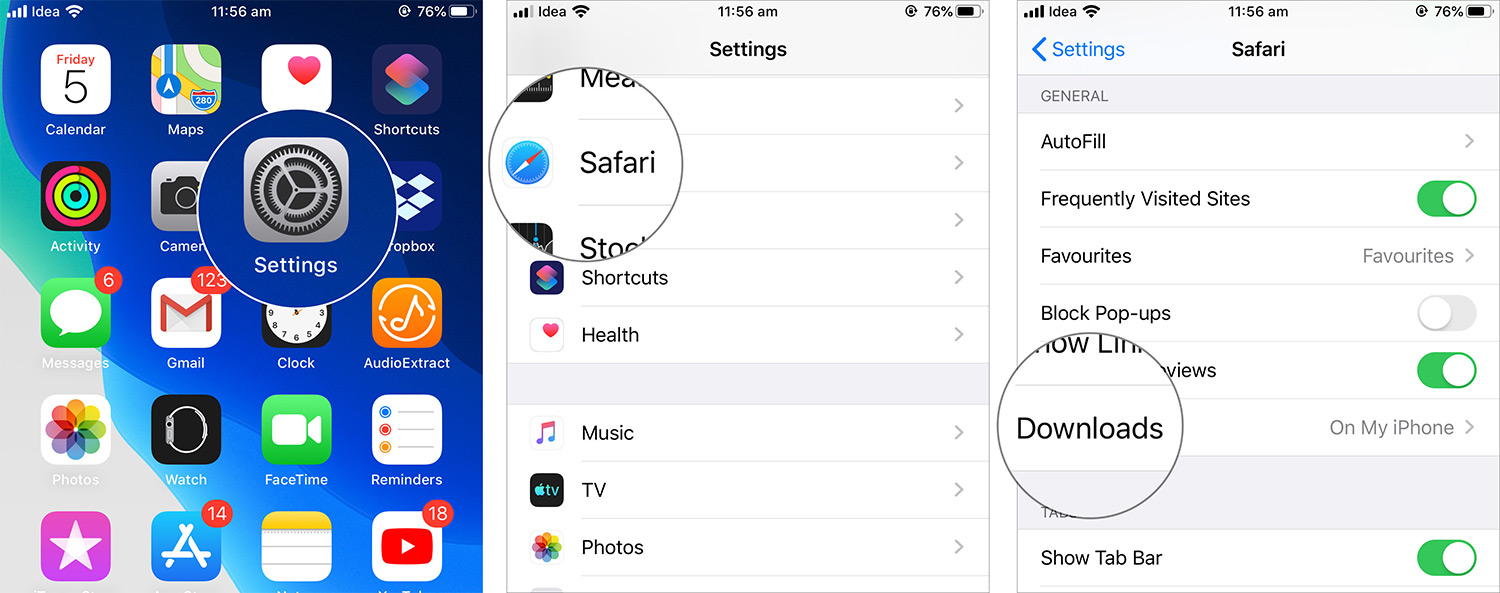
Step #1. Launch Settings App and scroll down to tap on Safari.


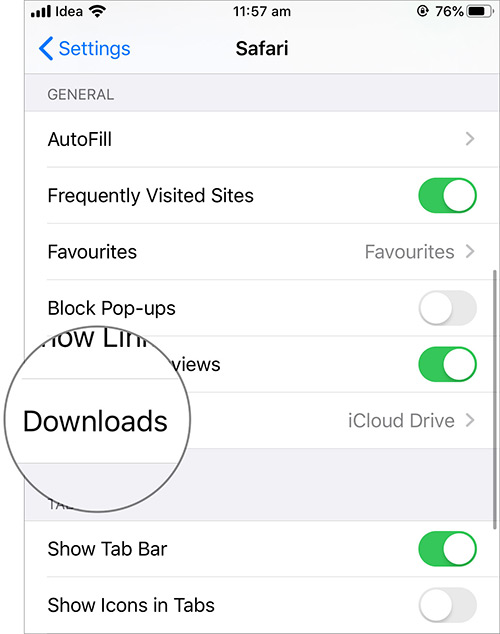
Step #2. Now, under the General section tap on Downloads.


Step #3. Now you’ll be asked whether to store downloaded files on iCloud Drive or On My iPhone. Tap on On My iPhone and then on Other…


Step #4. Once done, you will see an option of Downloads folder under On My iPhone.


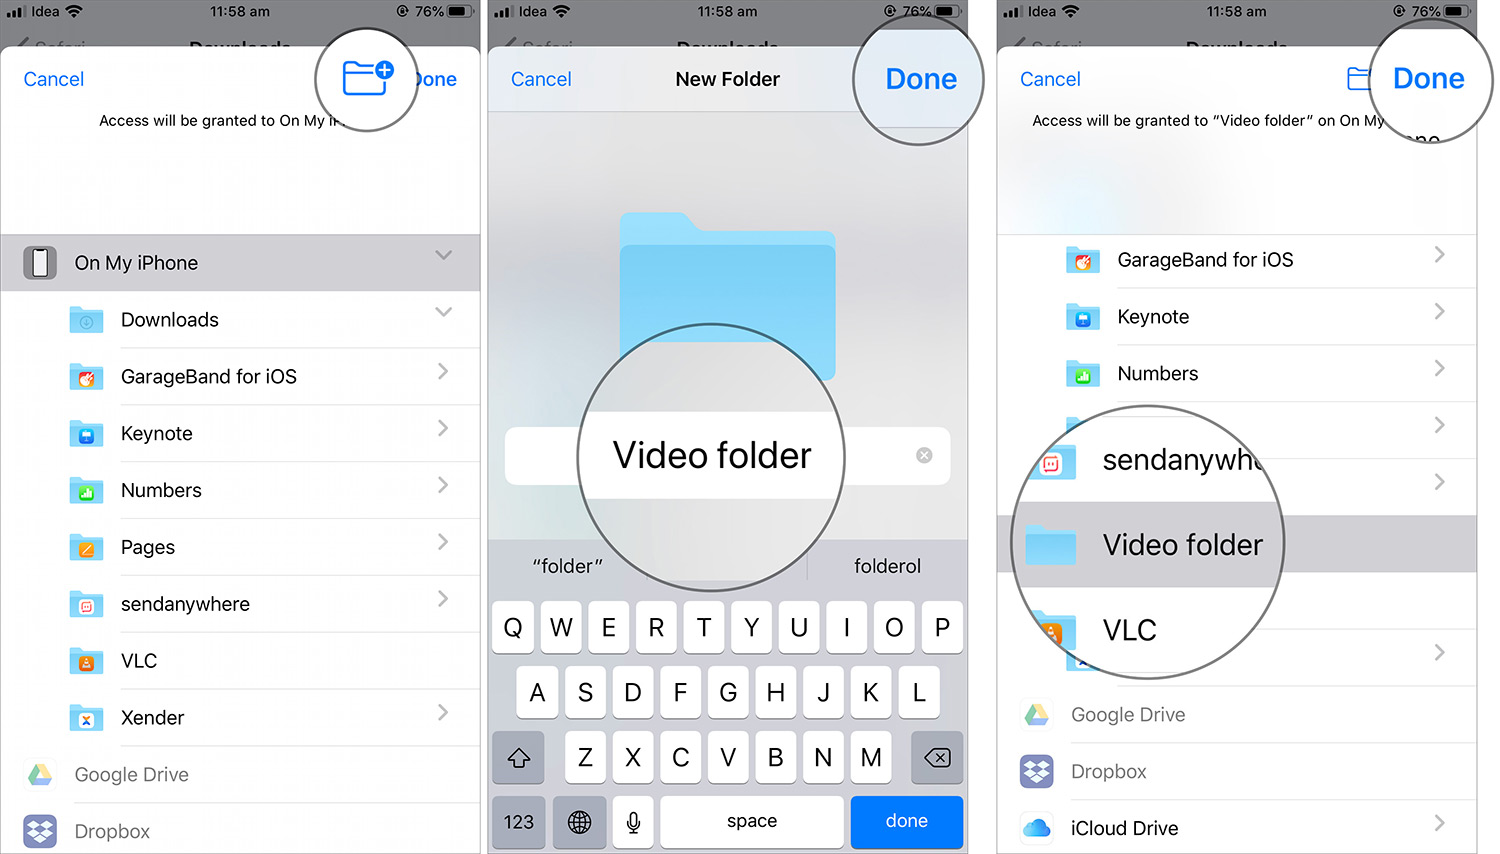
By default, all the files will be downloaded in that folder and if you want to locate them in another folder, and then tap on Add Folder option on the top right corner.

Next up, name the folder of your choice and tap on Done.


That’s it! You can create separate folders under downloads section with the above procedure and make sure that you have separate folders for each category of downloads.

This will make it easier for you to find the files when you need the most! You can find these files in your File Manager → On My iPhone → Downloads → Your Folders.
How to Remove Download List Items of Safari Downloads

Once you’ve downloaded the files, it’s important for you to track how long you need them. This will surely save you lots of space if you aren’t using those downloaded files anymore and want to delete them. Here’s how to do it.

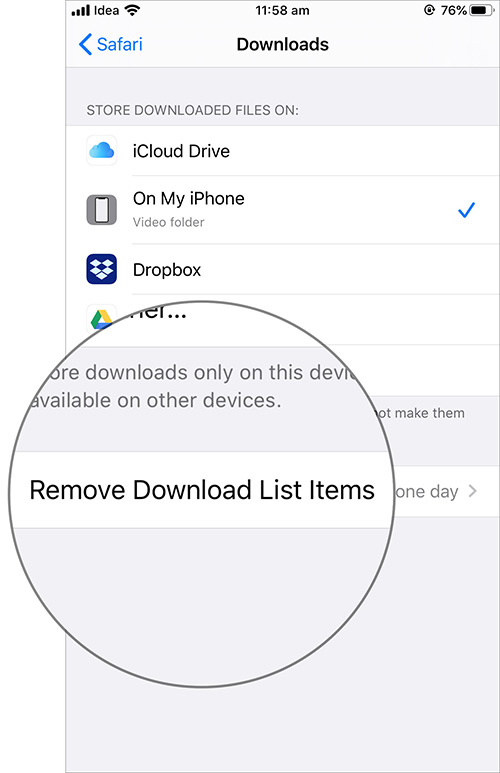
Step #1. Launch Settings App → Safari → Downloads.


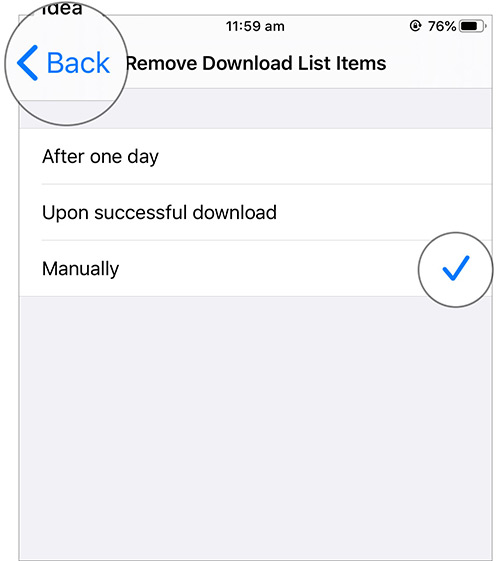
Step #2. Tap on Remove Download List Items.


Step #3. Now select any one of these three options (After one day, Upon successful download or Manually) as per your preference. Tap on Back and that’s done!


Isn’t it easy to remove the unwanted files from your download folder without even opening it? Do give it a try today! That’s all folks for today!

Wrapping Up…

So that’s how simple it is to download contents and managing them through the download folders. Do let us know if you face any issues while downloading content on your Safari.

Sponsor ads:

Gihosoft RePicvid Free Photo Recovery Software provides a free photo recovery software for windows to help users recover the deleted or lost photo for free.

If you lost data after you updated to a new iPhone, you can always use Gihosoft iPhone Data Recovery to get the data back from the old iPhone or backup.You may also like: iphonerecovery.com

Thursday, July 4, 2019

How to Crop, Rotate, and Straighten Your Photos in iOS 13


In iOS 13, Apple enhanced the built-in photo editing capabilities available on iPhones and iPads, and redesigned the photo editing interface to make it easier to manipulate your pictures.


This article offers a brief introduction to the new photo editing interface in the stock Photos app by looking at how you can crop, rotate, and straighten your shots in next to no time.


The first thing to do is launch the stock Photos app on your iPhone or iPad, and then using the Photostab (shown in the first screen below) tap to select a picture from your Photo library.


If it isn't a recent photo that you want to edit, you can use the Days, Months, and Yearsviews to whittle down your collection. Alternatively, select a photo from one of your albums via the Albums tab.


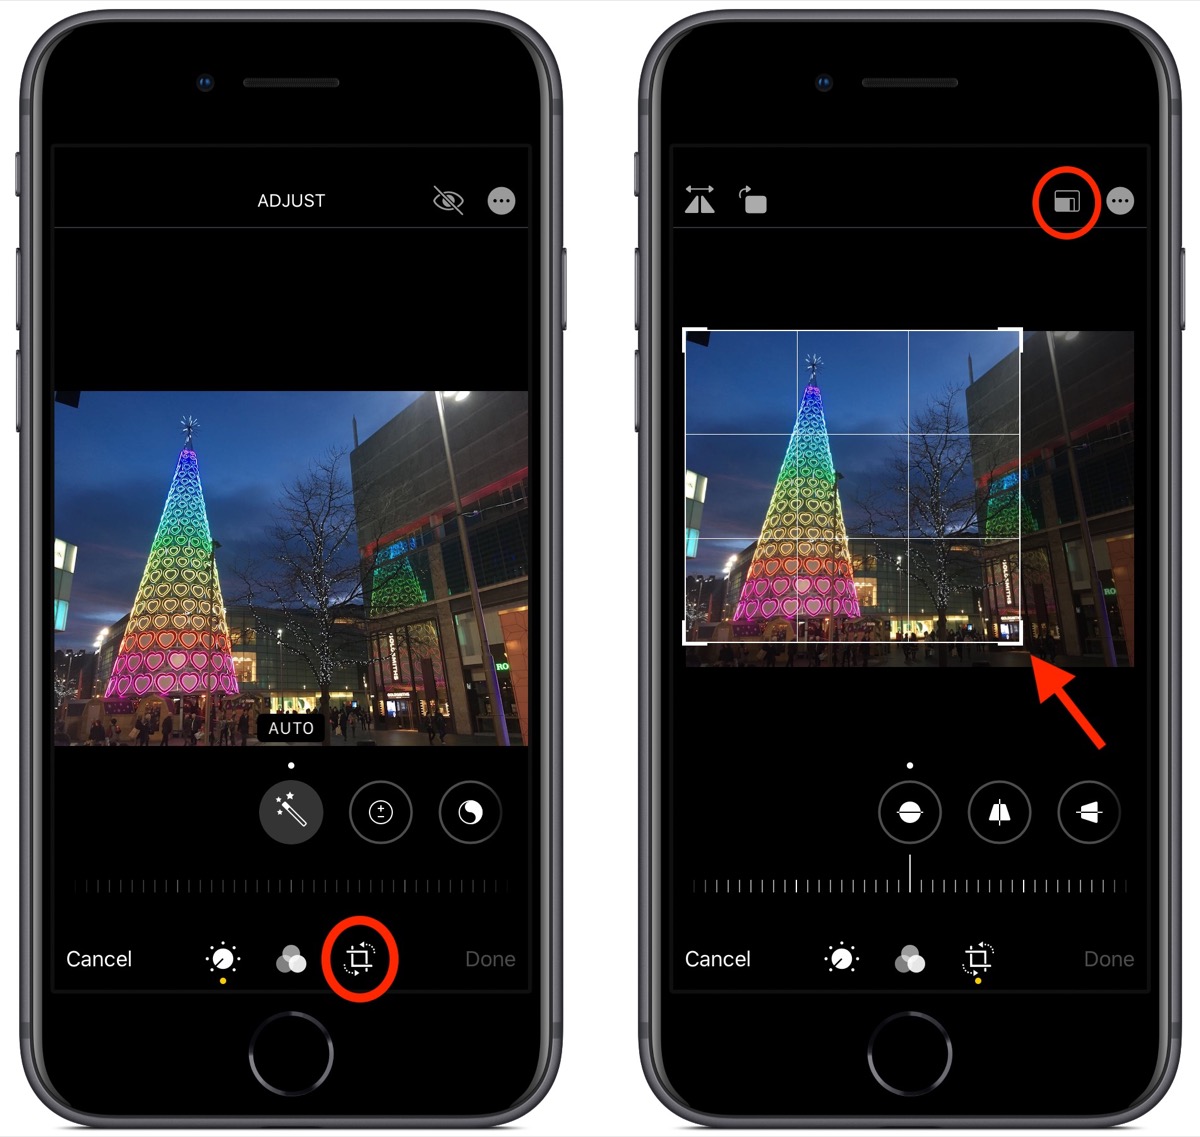
Once you've selected a picture, tap Edit in the top-right corner of the screen to enter the black editing interface.


Next, tap the Crop tool (the rightmost tool icon at the bottom of the screen). Notice that a grid now overlays your picture. Drag any corner of this frame to custom crop the image. You can also choose from a set of pre-defined cropping ratios by tapping the first of the two icons in the top-right corner of the screen.


Notice that the horizontal strip of adjustment tools below the photo also changed when you selected the Crop icon. From left to right, these allow you to straighten the image, adjust vertical alignment, and adjust horizontal alignment.


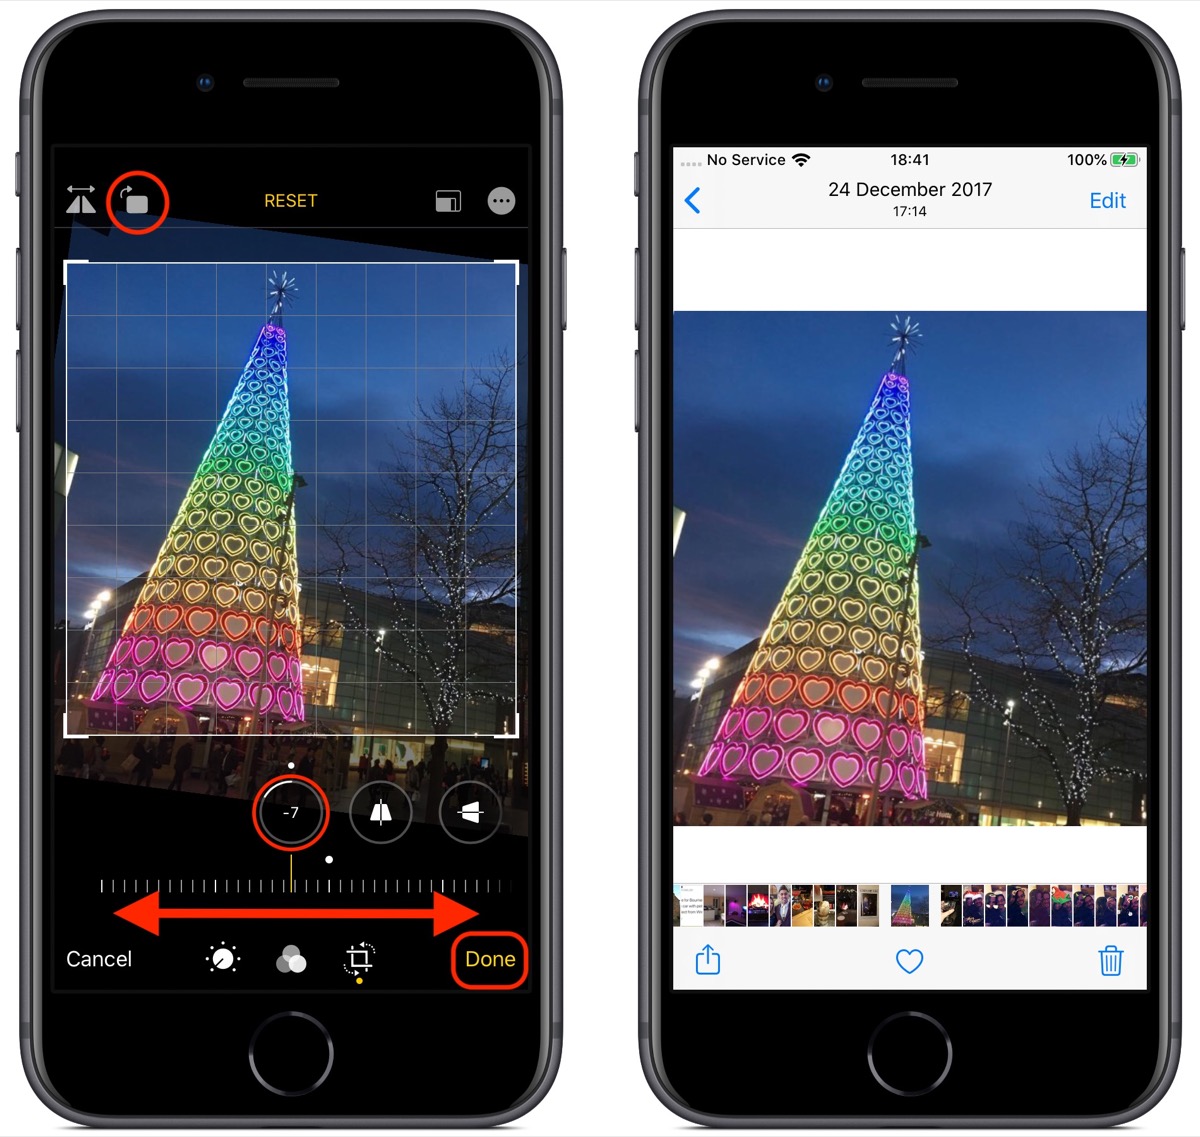
Tap one of the tools and slide the horizontal dial left or right with your finger to adjust to the desired level, indicated by the number in the selected tool's icon. At the top-right corner of the editing interface you'll also see more tools allowing you to flip and rotate the image.


If you make a mistake when editing your photo, simply tap the Reset button to the right of these tools to undo your adjustments. Press Done in the bottom-right corner of the screen when you're happy with your edits and they'll be automatically saved.


Remember, in addition to using the Photos app, you can also use these editing tools whenever you take a picture using the built-in Camera app – you don't even have to unlock your device to edit the photo you just shot.Sponsor ads:

Gihosoft RePicvid Free Photo Recovery Software provides a free photo recovery software for windows to help users recover the deleted or lost photo for free.

If you lost data after you updated to a new iPhone, you can always use Gihosoft iPhone Data Recovery to get the data back from the old iPhone or backup.You may also like: iphonerecovery.com

Monday, June 17, 2019

Kuo: Apple Will Launch 5.45-inch and 6.7-inch 5G iPhones in 2020


In his latest research note, Ming-Chi Kuo says that Apple will be launching three new iPhones in 2020 with OLED displays. The display sizes will be different from Apple’s current iPhone lineup which includes the 6.1-inch iPhone XR, 5.8-inch iPhone XS, and the 6.5-inch iPhone XS Max.

The 2020 iPhone lineup will comprise of a low-end 6.1-inch iPhone featuring an OLED display and LTE connectivity. The 5.8-inch iPhone XS will be replaced by a smaller 5.45-inch 5G iPhone, with the iPhone XS Max being replaced by a bigger 6.7-inch OLED 5G iPhone. For its 5G chips, Apple will be securing the modem from Qualcomm, with Samsung complementing it. The RF power amplifiers will be supplied by Broadcom.

While two out of the three iPhones that Apple launches in 2020 will feature 5G connectivity, Kuo expects Apple to move its entire iPhone lineup to 5G by 2021. The analyst also believes that Apple’s own in-house developed 5G modem will be ready for use by 2022 or 2023 which should allow the company to reduce its reliance on Samsung and Qualcomm.
Our Take

Rumors of Apple working on a 5G iPhone for 2020 have been circulating for quite some time now. This was one of the key reasons as to why Apple decided to settle with Qualcomm and paid it billions of dollars. Given that the 5G iPhones will launch with a completely new design, it makes sense for Apple to play around with the display sizes as well.

The 5.45-inch iPhone with its minimal bezels should be the perfect iPhone SE replacement for many, while the 6.7-inch 5G iPhone should be perfect for power users. It remains to be seen if Apple will be able to further reduce the bezel size on its 2020 iPhones or it would increase the overall footprint of the 6.7-inch iPhone to factor in the bigger display.Sponsor ads:

Gihosoft RePicvid Free Photo Recovery Software provides a free photo recovery software for windows to help users recover the deleted or lost photo for free.

If you lost data after you updated to a new iPhone, you can always use Gihosoft iPhone Data Recovery to get the data back from the old iPhone or backup.You may also like: iphonerecovery.com

iPhone Manager:Get the ultimate Gihosoft iPhone Manager. Free download for PC/Mac.
[Via Antutu]

Monday, June 3, 2019

How Dark Mode in iOS 13 Looks Like


iOS 13 comes with plenty of new features but for many, the biggest highlight of the release is going to be the new Dark mode. Apple has finally added a native system-wide Dark mode to the OS which looks stunning on iPhones with an OLED display. Even on the iPhone XR with its Liquid Retina LCD display, Dark mode gives the UI a very refreshed look.

Apple seems to have put a lot of thought into Dark mode in iOS 13. The company has not simply used a black background across iOS as that would have made things difficult to read. Instead, it uses different shades of dark backgrounds to differentiate UI elements from each other and ensure that text is easier to read.

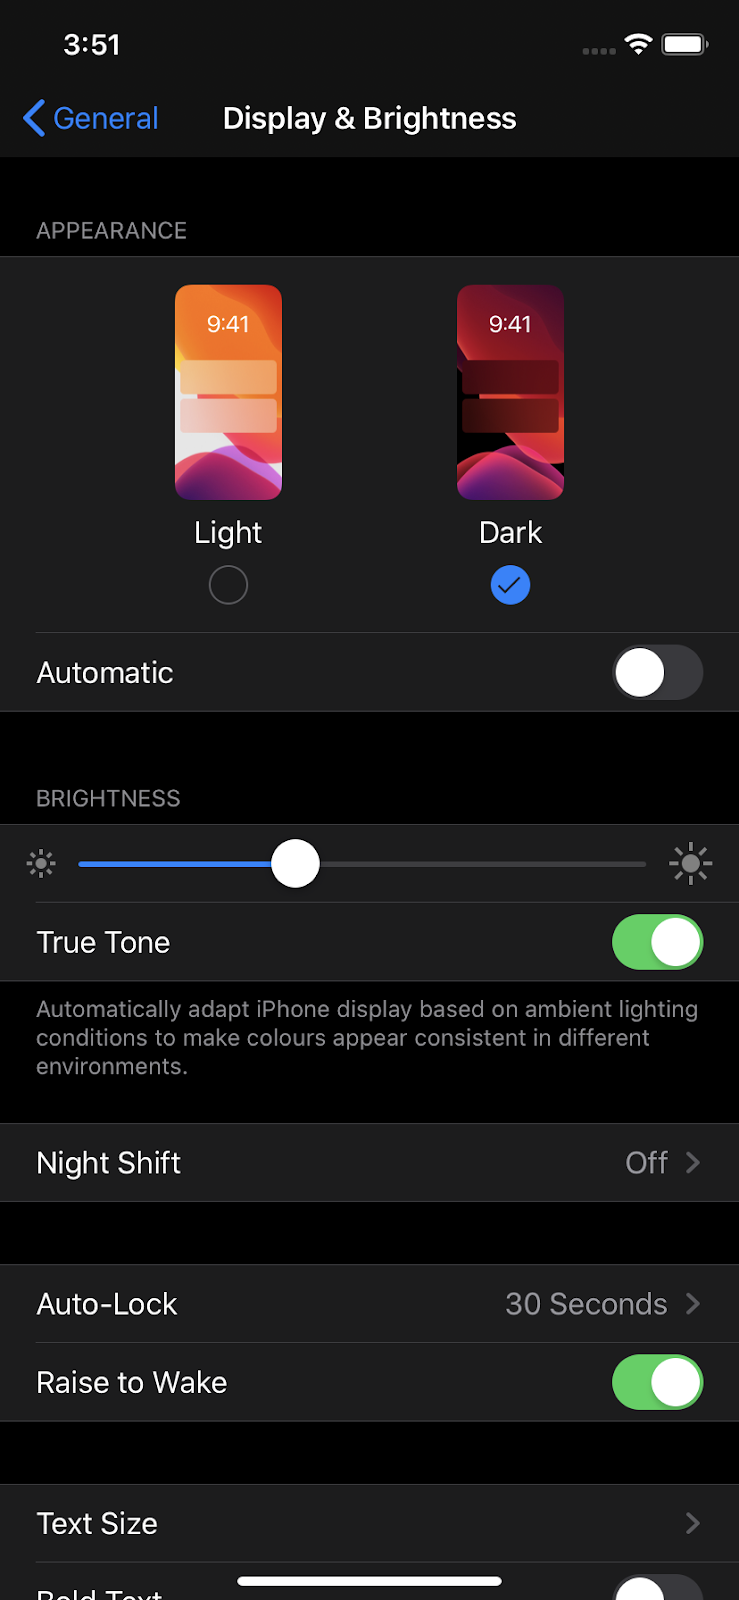
Dark mode in iOS 13 can be triggered either from the Control Center or from Settings -> Display. Apart from triggering it manually, there’s an option to trigger it automatically after sunset or one can set up a custom schedule as well. Below is a gallery showing how iOS 13 looks like with Dark mode enabled.


Dark mode can be enabled from the Control Center…


Or it can be enabled from Settings -> Display & Brightness.


Dark mode can be enabled automatically after sunset or a custom schedule can be specified.


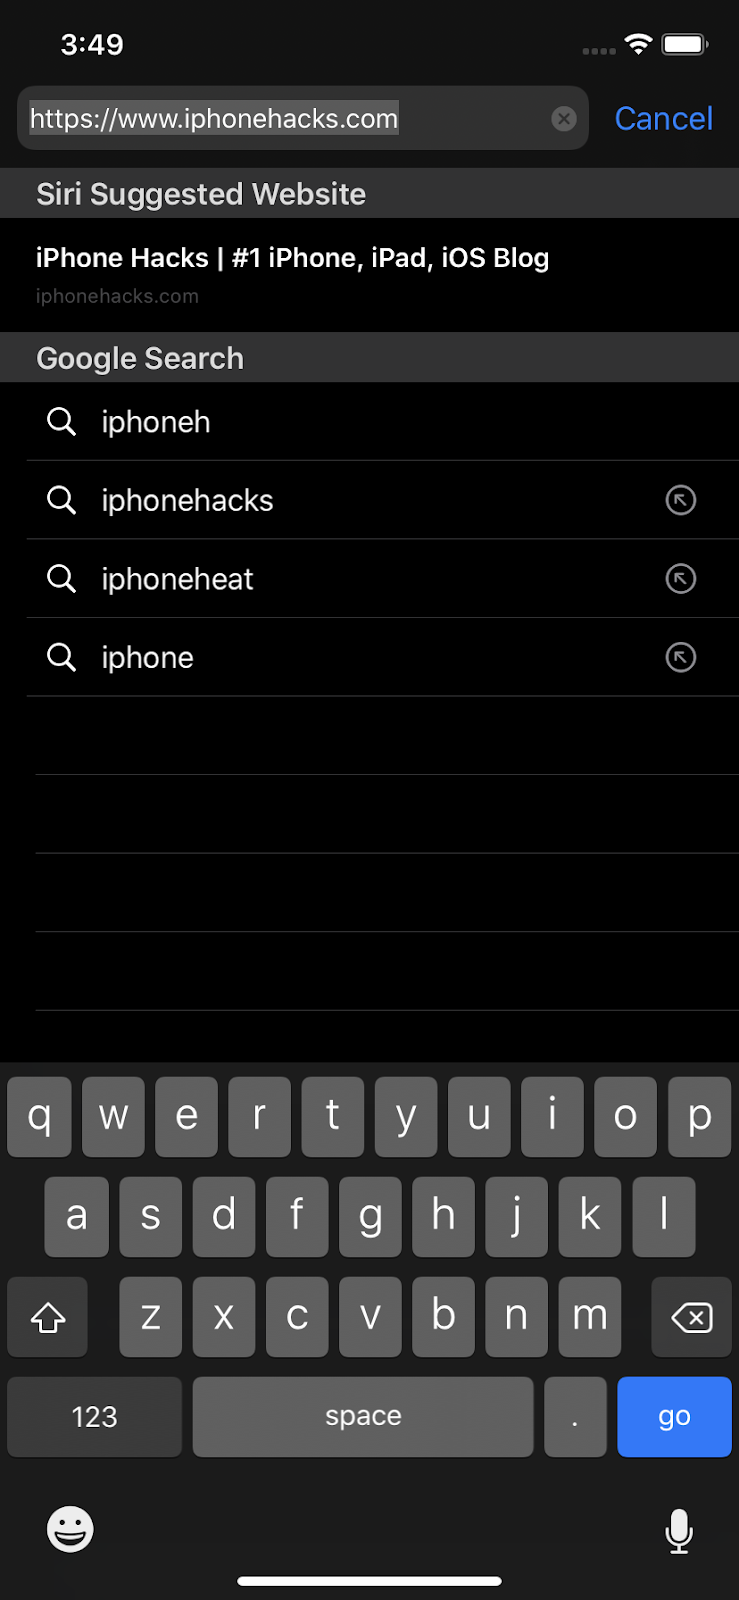
Dark mode in Safari has been thought out properly…


It does not force render websites with a dark background like some other browser.


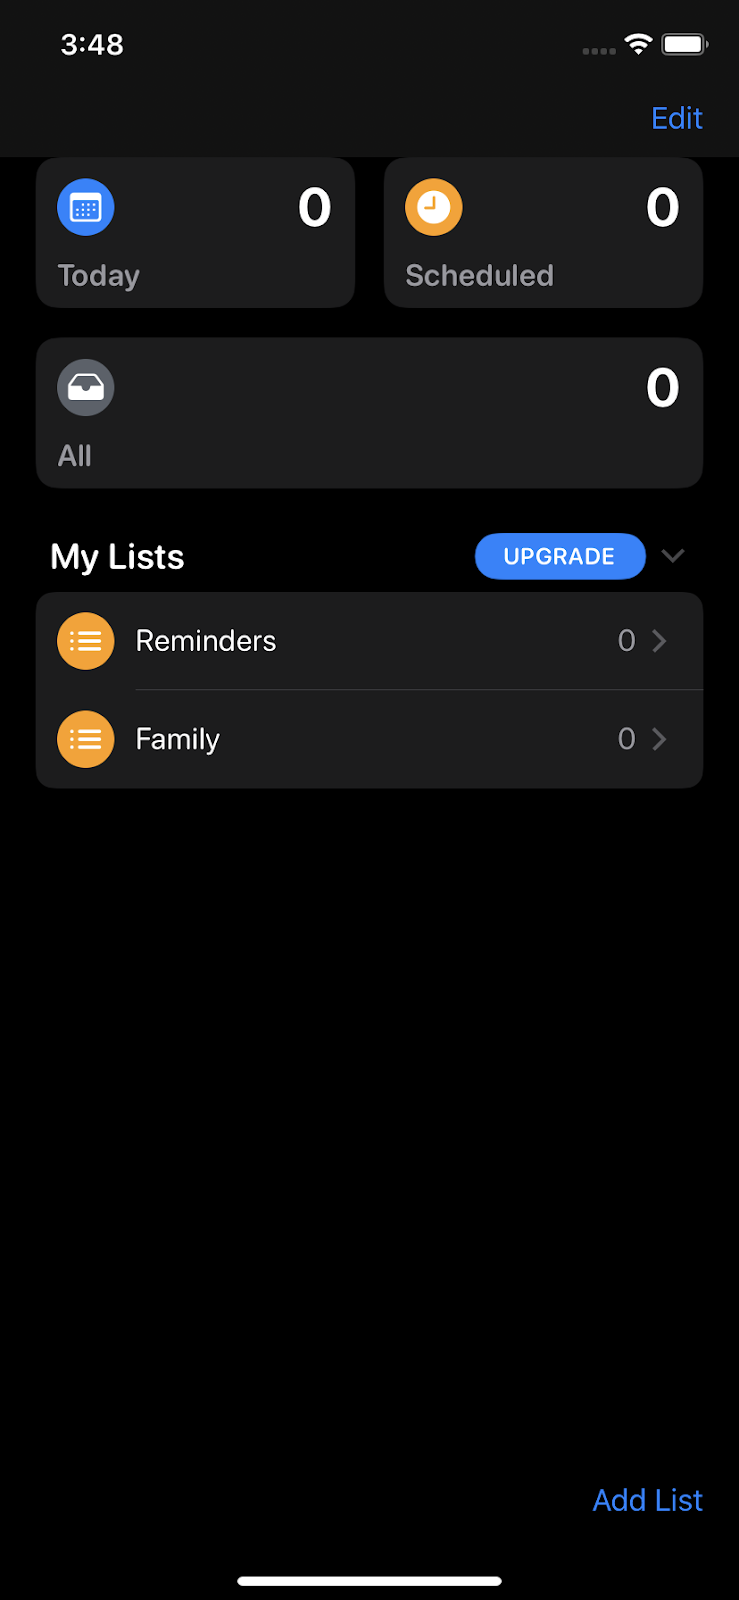
The new Reminders app in iOS 13.


The Health app looks pretty good with Dark mode enabled.


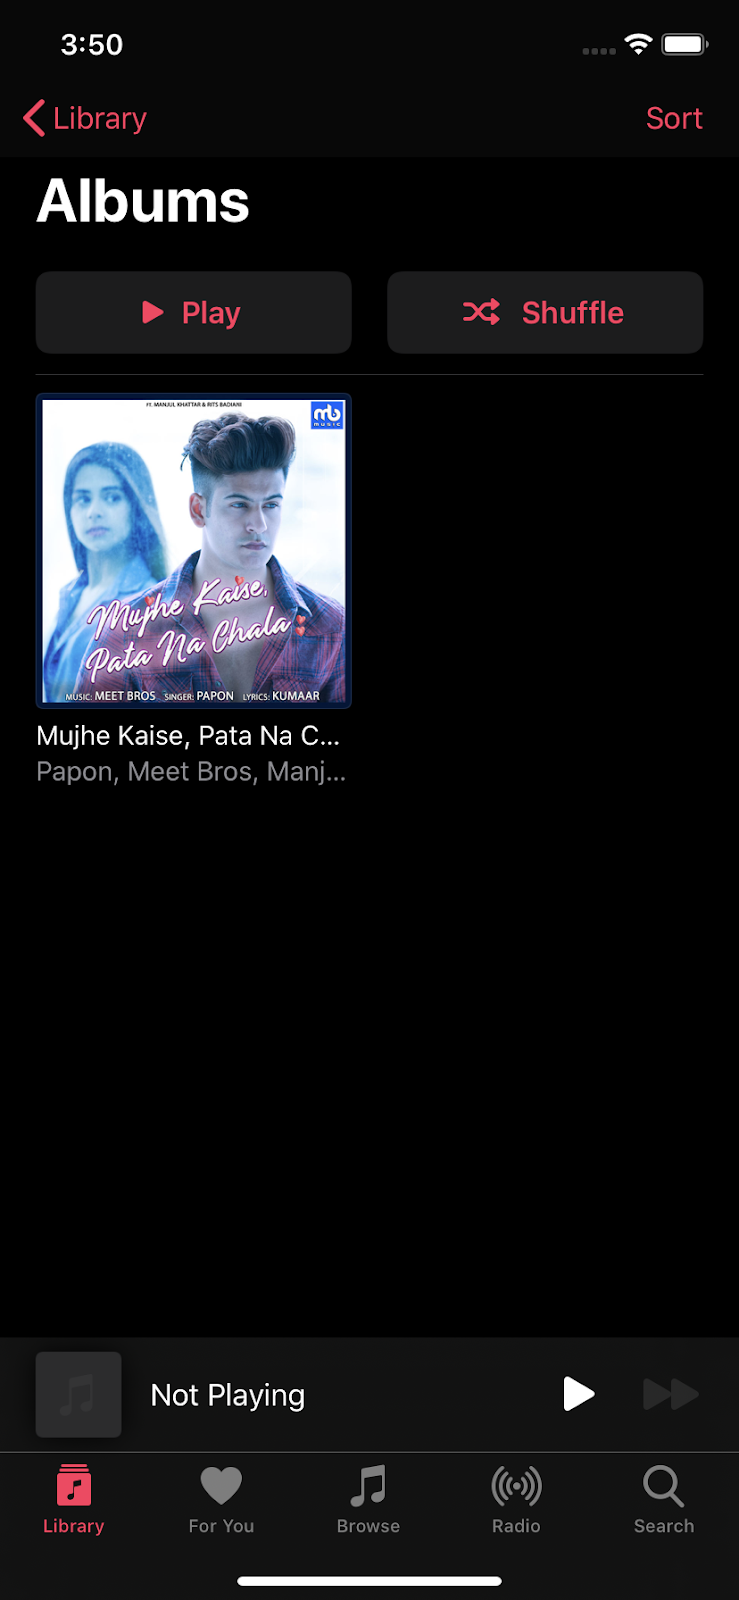
Some iOS 13 system apps with Dark mode enabled…


Even the App Store gets a Dark theme in iOS 13.


The Files app with Dark mode enabled.


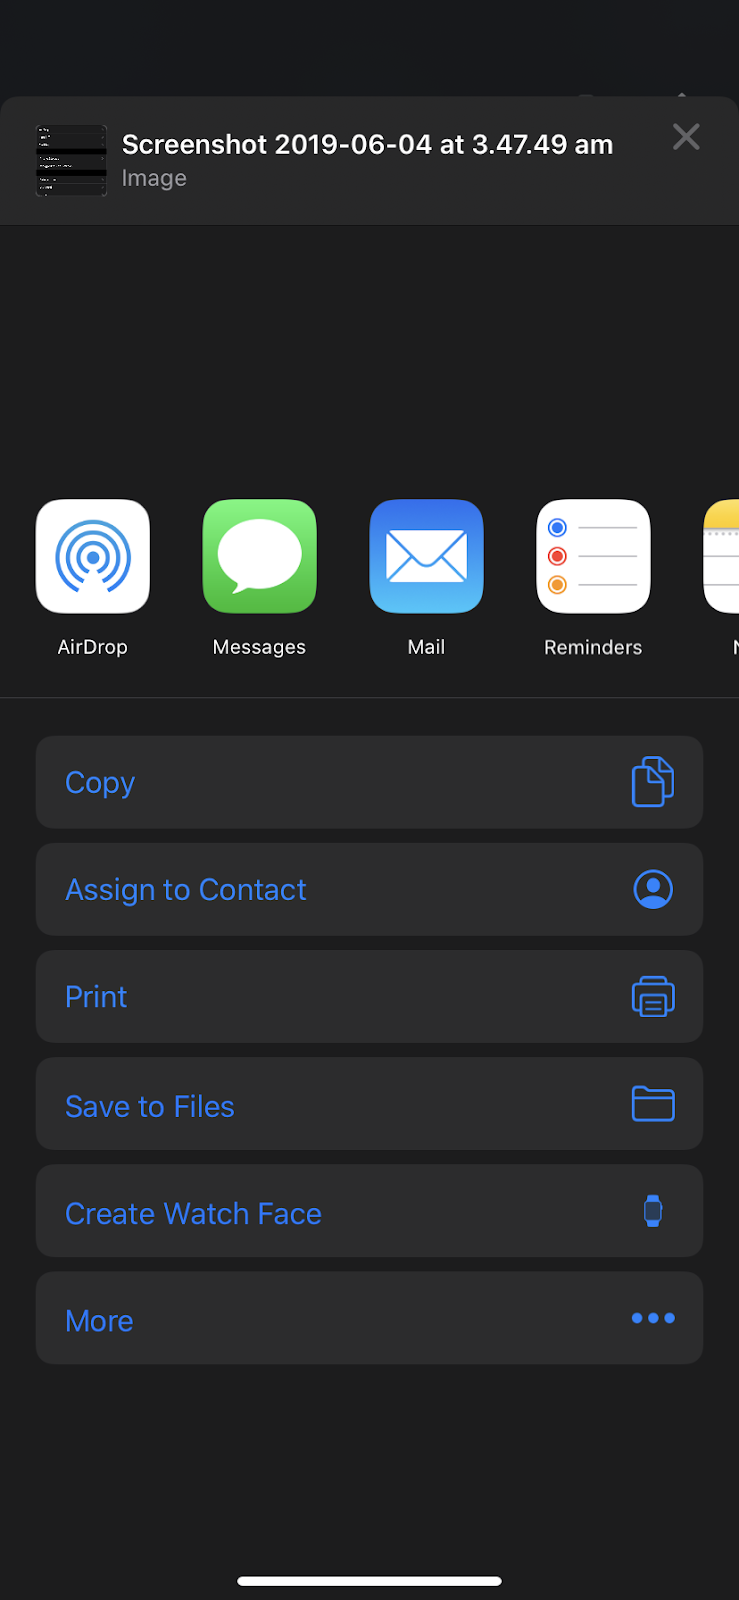
The new Share menu in iOS 13 with Dark mode enabled.


Widgets get a darker background shade to make reading content easier.


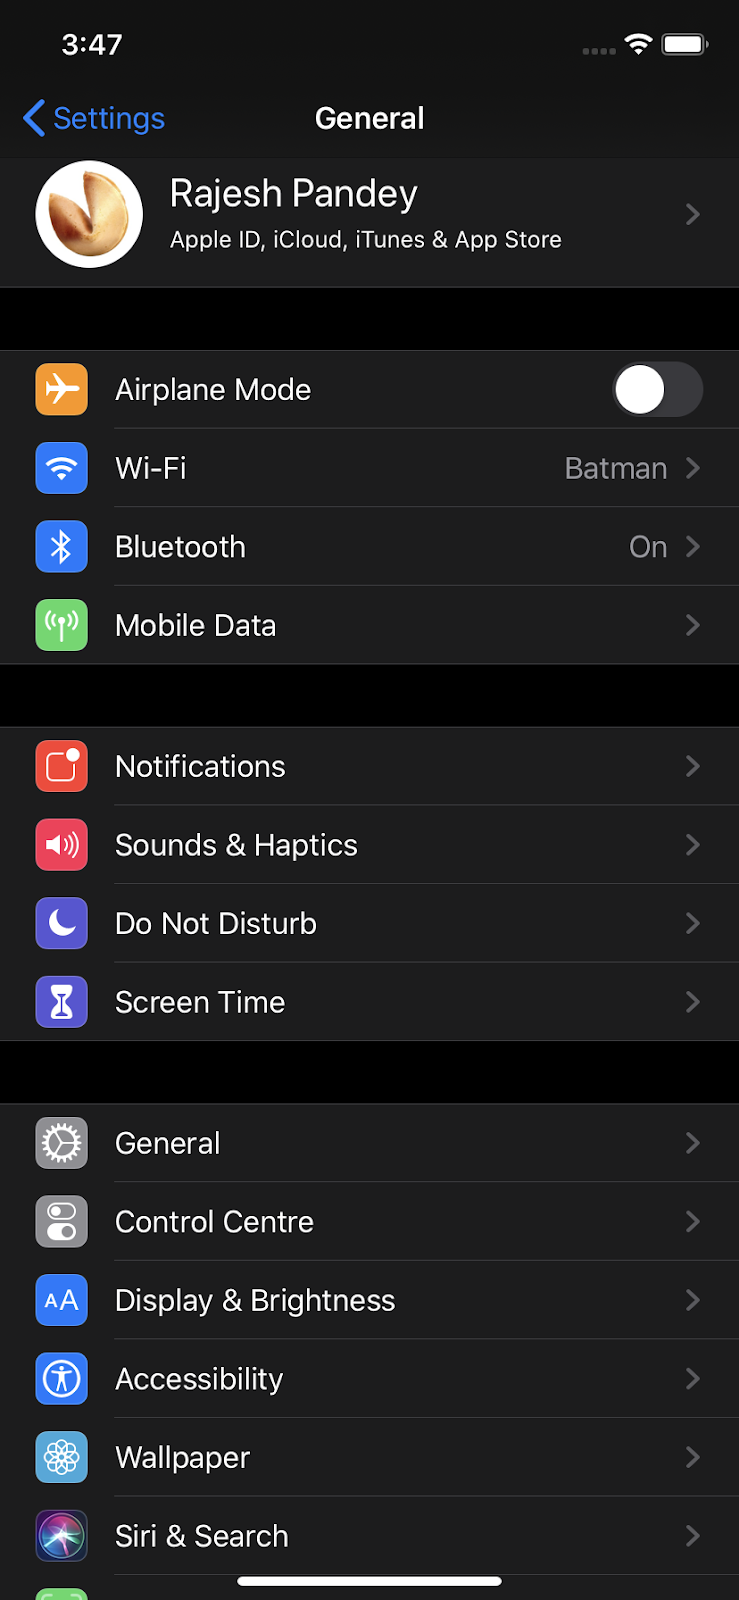
Settings app with Dark mode enabled and colorful icons looks eye-catching!


What are your thoughts about iOS 13’s Dark mode? Drop a comment and let us know!

Also Read:Free Online Movie Streaming Sites in 2019

Also Read:log out of Facebook Messenger

Also Read:Free Audio MP3 Cutter apps