Friday, July 19, 2019

How to Automatically Close Safari Tabs in iPhone and iPad


Did you know that Safari has a 500 tab limit? It will remember up to 500 tabs without slowing down your iPhone or iPad. Of course, it won’t cache all of those web pages and managing those hundreds of tabs can be quite difficult too. I’m one of those people who do not like closing tabs, even though there’s a quick shortcut for it (tap and hold the tab switcher). It seems like the designers at Cupertino empathize with me as there’s a new way to automatically close Safari tabs in iOS 13.
Close Safari Tabs in iOS 13 and iPadOS 13 on iPhone and iPad


When you try to close all tabs in Safari in iOS 13 or iPadOS 13 (using the tap and hold gesture on the tab switcher), you’ll see a new popup. This will only appear the first time you do this. It will ask you if you’re interested in automatically closing Safari tabs in the future. You can ask Safari to do this for you every day, every week or every month. I think for most people, the month timeframe is the best option.
How to Enable This Feature

If you missed that popup once, you don’t need to worry. You can go back and enable it or disable it at any time.

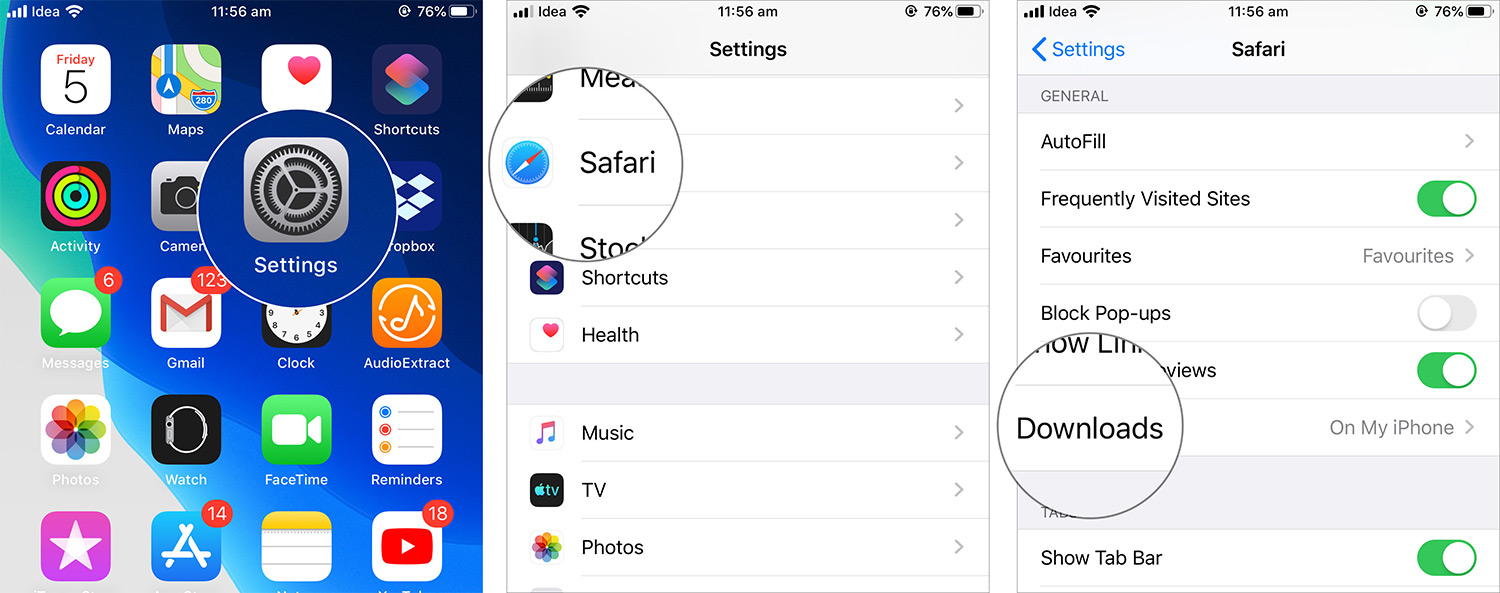
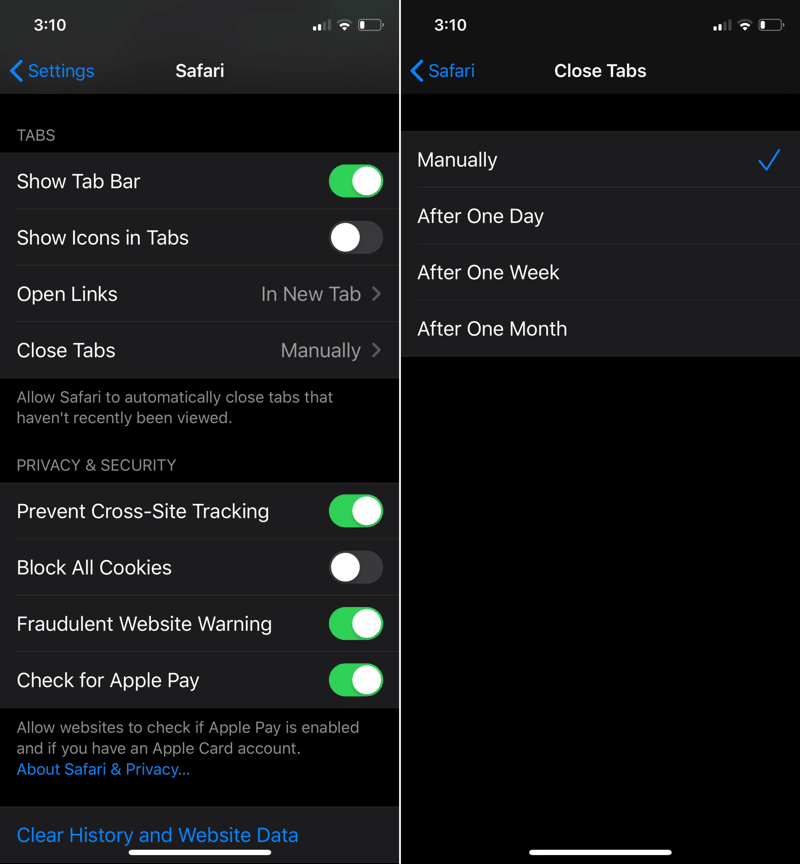
Step 1: Open Settings app.

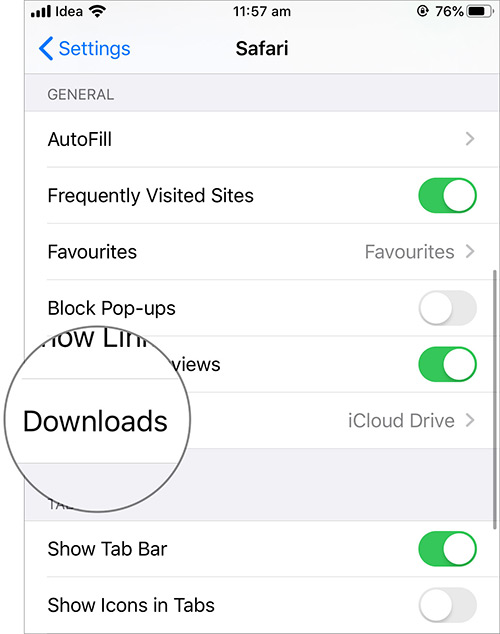
Step 2: Tap on Safari.

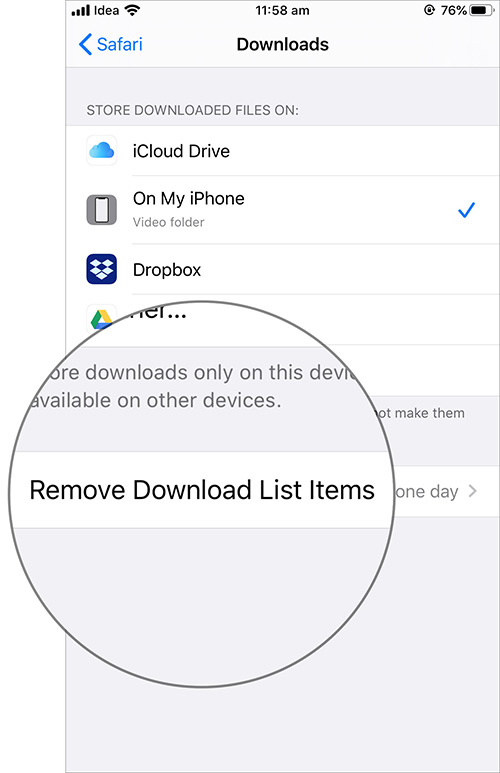
Step 3: Go to the Close Tab section.

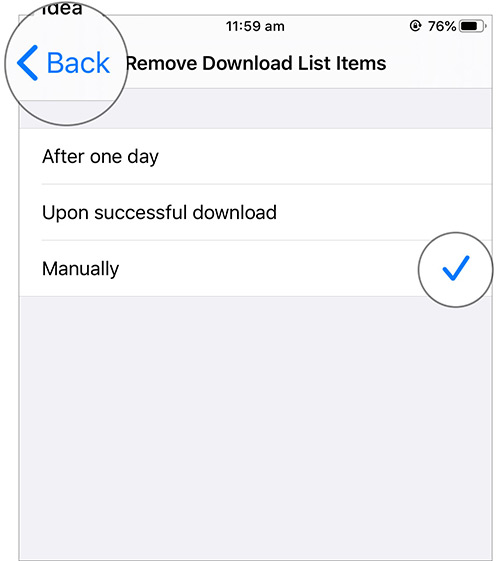
Step 4: From here, you can choose between the following options: Manually, After One Day, After One Week, and After One Month, depending on your needs.


If you choose the After One Day option, you can start using Safari with a clean slate every morning.
More iOS 13 How-tos

We’re working on bringing you more detailed guides for how to use the new and awesome features in iOS 13. Once you’ve read our iOS 13 tips and tricks article, read our how-tos below.read more:top paid android games

read more:limetorrents

read more:mp3boo alternatives


Thursday, July 11, 2019

How to Use Safari Download Manager on iPhone and iPad in iOS 13


How to Download a Video or an Audio While Browsing in Safari App

How many different apps have you used to download an audio or a video from a particular website on your iPhone or iPad? It’s time to delete those all apps and get straight into the Safari browser to download everything! Here’s how you can do it.

Step #1. Launch Safari app on your iPhone or iPad.

Step #2. Open any website to download a file, audio or a video.

Step #3. Long Press on audio or video and tap on Download linked file.


Step #4. Now you’ll see a video has started downloading in the icon (↓) on the top right corner.


Step #5. Once the download is completed, you can open the file by taping on it.


That’s it! This is how simple to download a file in Safari browser.

Now that you know how to download contents from Safari, it’s time to manage them and bring them collectively to a specified folder of your choice.
How to Change Safari’s Download Folder in iOS 13 and iPadOS

Before you download anything on Safari, make sure that the files you download goes into a specific folder and don’t congest your iCloud Drive with full of downloads. Here’s how you can do it.

Step #1. Launch Settings App and scroll down to tap on Safari.


Step #2. Now, under the General section tap on Downloads.


Step #3. Now you’ll be asked whether to store downloaded files on iCloud Drive or On My iPhone. Tap on On My iPhone and then on Other…


Step #4. Once done, you will see an option of Downloads folder under On My iPhone.


By default, all the files will be downloaded in that folder and if you want to locate them in another folder, and then tap on Add Folder option on the top right corner.

Next up, name the folder of your choice and tap on Done.


That’s it! You can create separate folders under downloads section with the above procedure and make sure that you have separate folders for each category of downloads.

This will make it easier for you to find the files when you need the most! You can find these files in your File Manager → On My iPhone → Downloads → Your Folders.
How to Remove Download List Items of Safari Downloads

Once you’ve downloaded the files, it’s important for you to track how long you need them. This will surely save you lots of space if you aren’t using those downloaded files anymore and want to delete them. Here’s how to do it.

Step #1. Launch Settings App → Safari → Downloads.


Step #2. Tap on Remove Download List Items.


Step #3. Now select any one of these three options (After one day, Upon successful download or Manually) as per your preference. Tap on Back and that’s done!


Isn’t it easy to remove the unwanted files from your download folder without even opening it? Do give it a try today! That’s all folks for today!

Wrapping Up…

So that’s how simple it is to download contents and managing them through the download folders. Do let us know if you face any issues while downloading content on your Safari.

Sponsor ads:

Gihosoft RePicvid Free Photo Recovery Software provides a free photo recovery software for windows to help users recover the deleted or lost photo for free.

If you lost data after you updated to a new iPhone, you can always use Gihosoft iPhone Data Recovery to get the data back from the old iPhone or backup.You may also like: iphonerecovery.com

Thursday, July 4, 2019

How to Crop, Rotate, and Straighten Your Photos in iOS 13


In iOS 13, Apple enhanced the built-in photo editing capabilities available on iPhones and iPads, and redesigned the photo editing interface to make it easier to manipulate your pictures.


This article offers a brief introduction to the new photo editing interface in the stock Photos app by looking at how you can crop, rotate, and straighten your shots in next to no time.


The first thing to do is launch the stock Photos app on your iPhone or iPad, and then using the Photostab (shown in the first screen below) tap to select a picture from your Photo library.


If it isn't a recent photo that you want to edit, you can use the Days, Months, and Yearsviews to whittle down your collection. Alternatively, select a photo from one of your albums via the Albums tab.


Once you've selected a picture, tap Edit in the top-right corner of the screen to enter the black editing interface.


Next, tap the Crop tool (the rightmost tool icon at the bottom of the screen). Notice that a grid now overlays your picture. Drag any corner of this frame to custom crop the image. You can also choose from a set of pre-defined cropping ratios by tapping the first of the two icons in the top-right corner of the screen.


Notice that the horizontal strip of adjustment tools below the photo also changed when you selected the Crop icon. From left to right, these allow you to straighten the image, adjust vertical alignment, and adjust horizontal alignment.


Tap one of the tools and slide the horizontal dial left or right with your finger to adjust to the desired level, indicated by the number in the selected tool's icon. At the top-right corner of the editing interface you'll also see more tools allowing you to flip and rotate the image.


If you make a mistake when editing your photo, simply tap the Reset button to the right of these tools to undo your adjustments. Press Done in the bottom-right corner of the screen when you're happy with your edits and they'll be automatically saved.


Remember, in addition to using the Photos app, you can also use these editing tools whenever you take a picture using the built-in Camera app – you don't even have to unlock your device to edit the photo you just shot.Sponsor ads:

Gihosoft RePicvid Free Photo Recovery Software provides a free photo recovery software for windows to help users recover the deleted or lost photo for free.

If you lost data after you updated to a new iPhone, you can always use Gihosoft iPhone Data Recovery to get the data back from the old iPhone or backup.You may also like: iphonerecovery.com